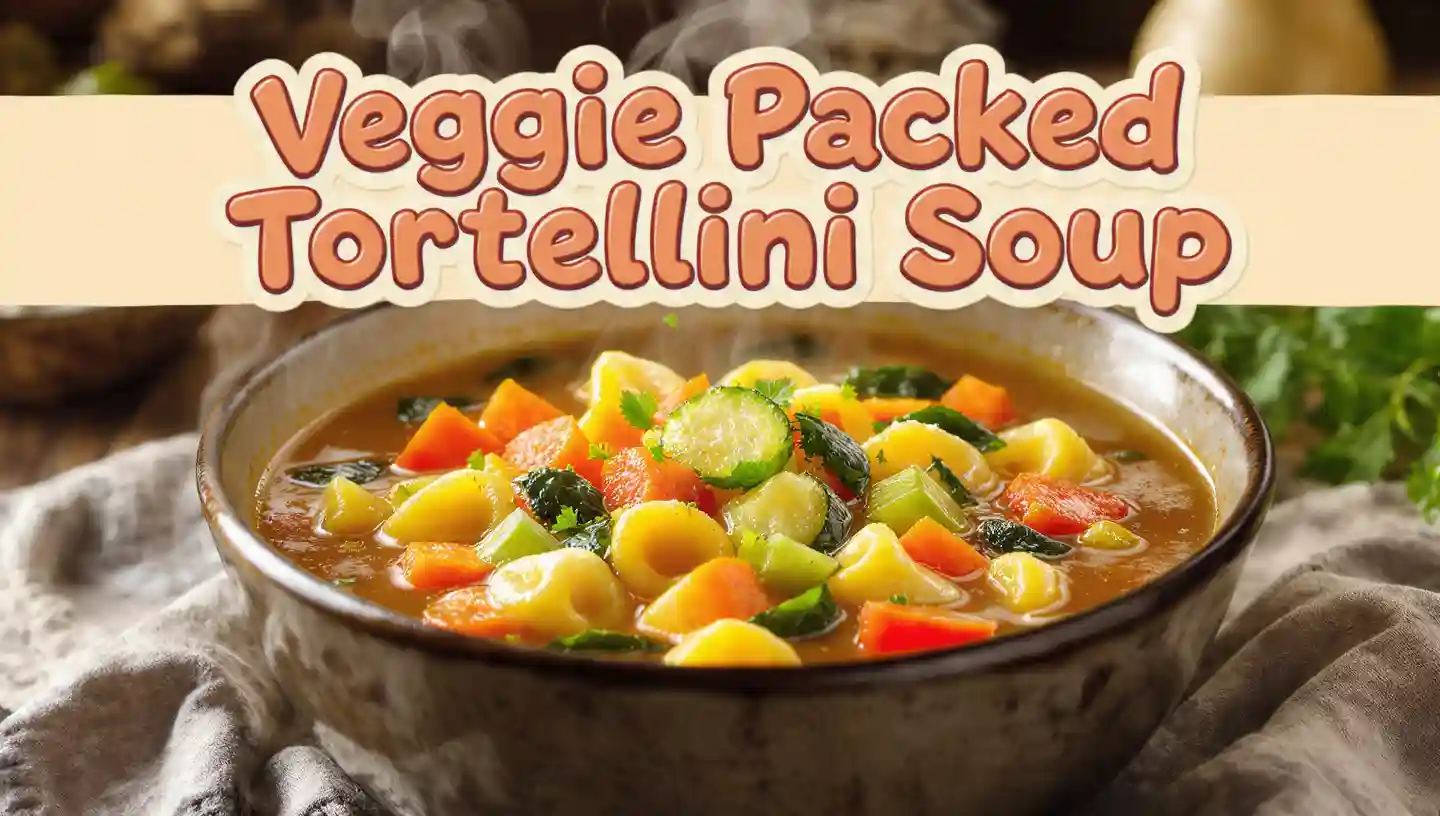
There’s something deeply comforting about a bowl of soup that manages to be both nourishing and indulgent at the same time. This veggie packed tortellini soup does exactly that—it’s loaded with colorful vegetables that actually taste good (not just thrown in for show), pillowy cheese tortellini that make every spoonful feel special, and a broth that’s been properly coaxed into being flavorful without relying on a jar of bouillon paste.
I’ve made a lot of vegetable soups over the years, and the ones that fail usually do so for the same reason: they’re either so virtuous they taste like hot salad water, or they’re so heavy with pasta or potatoes that the vegetables are just an afterthought. This tortellini soup walks the line beautifully. The pasta provides substance and that little hit of richness from the cheese filling, while the vegetables stay front and center—still bright, still with some texture, still tasting like themselves.
The real secret is in the layering. You’re building flavor from the bottom up, starting with aromatics, creating a vegetable-forward broth, and then timing everything so the tortellini comes out tender (never mushy) and the vegetables maintain their character. It’s not complicated, but the small details matter.
What Makes This Soup Work
Unlike some tortellini soups that are essentially cheese pasta swimming in broth with a few token vegetables, this one is designed around the vegetables. I use a generous amount—enough that you get multiple types in every spoonful—but I add them strategically so nothing turns to mush.
The tortellini is there for comfort and heartiness, but it doesn’t dominate. You want about one piece of tortellini per spoonful, not three or four. This ratio keeps the soup feeling substantial without crossing into stodgy territory.
The broth itself is somewhere between a light vegetable broth and a richer, almost creamy base. There’s no cream in it (though you can add some at the end if you want), but the starch from the tortellini and a little Parmesan rind simmered into the liquid create body and depth.
Ingredients (Serves 6-8)
For the base:
- 2 tablespoons olive oil
- 1 medium onion, diced
- 3 medium carrots, peeled and sliced into rounds
- 3 celery stalks, chopped
- 4 garlic cloves, minced
- 8 cups vegetable or chicken broth (homemade is lovely, but good quality store-bought works)
- 1 Parmesan rind (optional but adds wonderful depth)
- 1 bay leaf
- 1 teaspoon dried Italian seasoning
- Salt and pepper to taste
For the vegetables:
- 1 medium zucchini, halved lengthwise and sliced
- 2 cups chopped fresh spinach or kale (stems removed)
- 1 can (14 oz) diced tomatoes with juice
- 1 cup green beans, trimmed and cut into 1-inch pieces (fresh or frozen)
For the pasta:
- 12-16 oz cheese tortellini (fresh or frozen—both work)
To finish:
- Fresh basil or parsley
- Grated Parmesan
- A drizzle of good olive oil or a squeeze of lemon juice
Notes on ingredients:
The vegetable mix here is a guideline, not gospel. I like the combination of carrots for sweetness, celery for aromatics, zucchini for freshness, greens for earthiness, and green beans for a little snap. But you could absolutely use bell peppers, cauliflower, mushrooms, or whatever needs using up. The key is having a variety of textures and flavors.
For the tortellini, I usually reach for cheese-filled, but spinach-ricotta or even a meat-filled variety would be excellent. Fresh tortellini cooks faster (about 3-4 minutes) and has a more delicate texture. Frozen takes a bit longer (5-7 minutes) but is more forgiving if you accidentally let it sit in the soup a little too long.
Building the Soup
Start by getting your base right. Heat the olive oil in a large pot or Dutch oven over medium heat. Add the onion, carrots, and celery—the classic aromatic trio. You want to cook these slowly for about 8-10 minutes, stirring occasionally, until they’ve softened and the onion has turned translucent. This isn’t just about cooking them through; you’re coaxing out their natural sugars and building the flavor foundation for everything that follows.
When the vegetables are soft and fragrant, add the garlic. Give it just a minute—garlic burns easily and turns bitter, so you’re looking for that moment when it becomes aromatic but hasn’t taken on any color.
Pour in your broth, then add the bay leaf, Italian seasoning, and Parmesan rind if you’re using one. That Parmesan rind is one of my favorite tricks for adding umami and depth without any heaviness. If you buy blocks of Parmesan and have rinds lying around, freeze them for moments like this. If not, don’t stress—the soup is still excellent without it.
Bring everything to a gentle boil, then reduce to a simmer. Let it go for about 15 minutes. This gives the flavors time to meld and the broth time to become something more than just the sum of its parts. Taste it at this point and adjust the seasoning. It should taste good enough that you’d be happy sipping it on its own, because this broth is the backbone of the entire soup.
Adding the Vegetables (And Not Ruining Them)
Here’s where timing becomes important. Not all vegetables cook at the same rate, and nothing is sadder than overcooked zucchini that’s gone slimy or greens that have turned army-green and lifeless.
Add the green beans and the canned tomatoes (with their juice) to the simmering broth first. These need about 5-7 minutes to become tender. If you’re using fresh green beans, they’ll take the full 7 minutes; frozen ones are often pre-blanched and will be ready sooner.
Next comes the zucchini. This only needs about 3-4 minutes. You want it to still have a little bite—it’ll continue cooking slightly from the residual heat even after you turn off the stove.
The greens go in last, just a minute or two before serving. Spinach wilts almost immediately; kale can handle a bit more time if you like it softer. Either way, add these at the very end so they keep their color and don’t disintegrate.
Cooking the Tortellini (The Right Way)
This is the most common mistake with this kind of soup: adding the tortellini too early or cooking it directly in the soup until it’s bloated and mushy. You want the pasta to be perfectly tender—cooked through but still with structure.
I usually cook the tortellini separately in boiling salted water according to package directions, then add it to individual bowls when serving. This might seem fussy, but it gives you much more control. The soup can sit on the stove staying warm while the pasta is cooked, and if you have leftovers, the tortellini won’t continue absorbing liquid and turning to paste overnight.
That said, if you want to cook it directly in the soup (which is absolutely fine for a weeknight dinner you’re eating right away), add it during the last 5-7 minutes of cooking. Just keep in mind that it’ll soak up some of the broth, so you might need to thin things out with a splash more liquid later.
For a truly foolproof approach similar to how I handle other one-pot soups like this easy one-pot cabbage soup, you can slightly undercook the tortellini and let it finish in the hot broth off the heat for a minute or two. This gentle finish prevents overcooking while still infusing the pasta with flavor.
Adjusting Texture and Richness
After everything’s in, assess the thickness. If the soup feels too thin, you have a few options. The easiest is to let it simmer uncovered for another 5-10 minutes to reduce slightly. The starch from the tortellini will also thicken the broth naturally as it sits.
If you want more richness, stir in a couple tablespoons of cream, half-and-half, or even a dollop of mascarpone right before serving. This isn’t necessary—the soup is lovely as is—but on a particularly cold night, it’s a nice touch.
On the flip side, if the soup gets too thick (especially if you’ve cooked the tortellini directly in it), thin it out with more broth or even a bit of pasta cooking water if you have it.
A squeeze of lemon juice or a drizzle of good olive oil right before serving brightens everything up and adds a layer of freshness that balances the richness of the cheese-filled pasta.
Variations and Swaps
Protein additions: This soup is vegetarian as written, but you could add cooked Italian sausage (browned and crumbled), shredded rotisserie chicken, or white beans for extra protein. If you’re adding beans, cannellini or chickpeas would be my choice—stir them in with the tomatoes so they have time to warm through and absorb some flavor.
Different tortellini: Try mushroom, pumpkin, or lobster-filled tortellini for a fancier version. Smaller tortellini work well here; the big ones can be a bit much in soup.
Vegetable swaps: Swap zucchini for yellow squash, use frozen mixed vegetables in a pinch, add diced bell peppers with the aromatics, throw in some quartered mushrooms, or use Swiss chard instead of spinach or kale.
Tomato options: If you’re not a fan of chunks of tomato, use tomato paste (about 2 tablespoons, stirred in with the garlic) for depth without the pieces, or a splash of crushed tomatoes for body.
Making it creamy: For a richer soup similar in approach to loaded baked potato soup, you can add heavy cream or blend a portion of the vegetables before adding the tortellini for a partially pureed base.
Serving Suggestions
I almost always serve this with crusty bread—something with a good crust for dunking. Garlic bread is a bit redundant given the garlic in the soup, but it’s never unwelcome.
At the table, set out grated Parmesan, red pepper flakes, and maybe some fresh herbs. Everyone can customize their bowl.
This soup is hearty enough to stand alone as a main course, but if you want to round out the meal, a simple side salad with a bright vinaigrette offers a nice contrast.
Storage and Reheating
Leftover tortellini soup keeps well for 3-4 days in the fridge. As mentioned, the pasta will absorb liquid as it sits, so you’ll likely need to add broth or water when reheating. Warm it gently on the stove over medium-low heat, stirring occasionally and adding liquid until you reach your desired consistency.
Freezing is trickier with this particular soup because cooked pasta doesn’t always thaw beautifully—it can become mushy. If you want to freeze it, I’d suggest freezing the broth and vegetables separately, then cooking fresh tortellini when you’re ready to eat.
Alternatively, freeze individual portions without the tortellini, then cook a small handful of fresh pasta per serving when you reheat. This gives you the convenience of a freezer meal without the compromised texture.
Final Thoughts
This veggie packed tortellini soup has become one of those recipes I turn to when I want something that feels like a treat but is actually sneaking in a solid amount of vegetables. It’s flexible enough to adapt based on what’s in the fridge, forgiving enough for weeknight cooking, and satisfying enough that everyone leaves the table happy.
The key is treating each component with a little respect—giving the aromatics time to develop, not overcooking the vegetables, and getting the tortellini just right. When all those elements come together in one bowl, topped with a shower of Parmesan and some torn basil, it’s the kind of meal that feels both comforting and nourishing in equal measure.