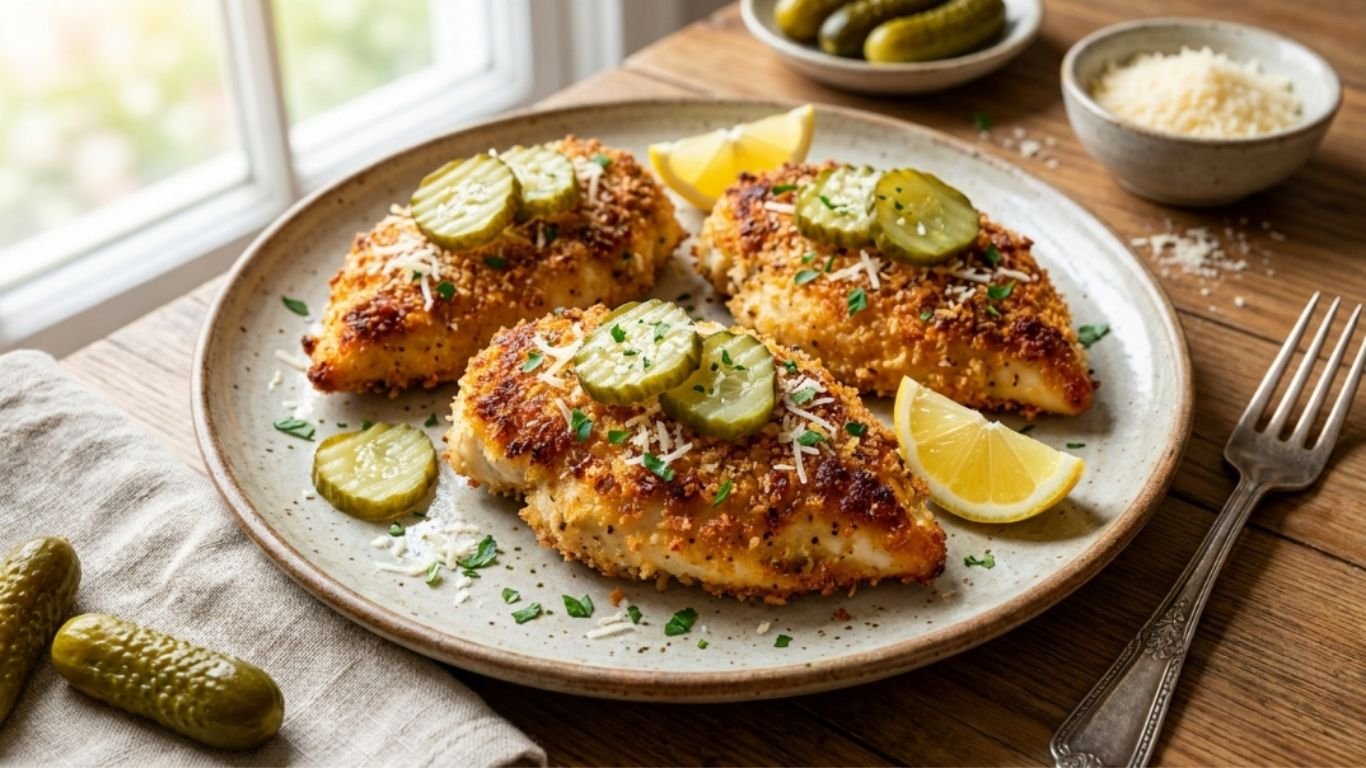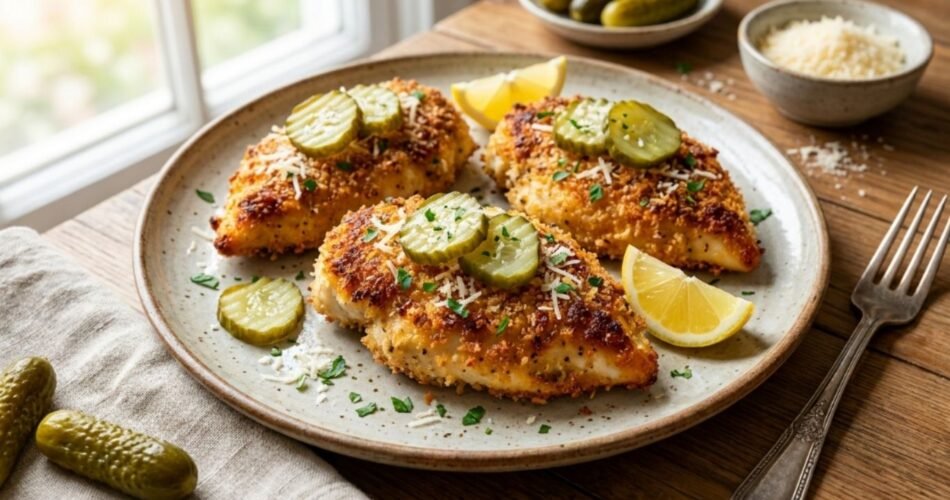
I’ll be honest — the first time someone suggested marinating chicken in pickle juice, I rolled my eyes a little. It sounded like a weird internet hack that wouldn’t actually work. Then I tried it. And now it’s one of the most-requested dinners in my house.
This crispy parmesan pickle chicken is exactly what it sounds like: juicy chicken breasts marinated in tangy pickle brine, coated in a golden parmesan crust, and cooked until perfectly crispy — all in about 30 minutes. It’s the kind of weeknight dinner that feels special without requiring any real effort.
The pickle brine does something almost magical to chicken. It tenderizes the meat, seasons it all the way through, and leaves behind just enough tang to make every bite interesting. Then the parmesan crust adds that salty, nutty crunch that makes it absolutely impossible to stop eating.
Whether you’re cooking for a hungry family, meal prepping for the week, or just trying to get a solid 30-minute chicken dinner on the table without losing your mind, this recipe delivers every single time.
Why You’ll Love This Recipe
- Ready in 30 minutes — from fridge to plate, even on the busiest nights
- The pickle brine does most of the work — you don’t need a complicated marinade
- Incredibly crispy without deep frying
- High in protein — great for weight management and muscle recovery
- Kid-friendly — the pickle flavor is subtle, not overwhelming
- Works three ways — air fryer, oven, or skillet (all covered below)
- Budget-friendly — uses pantry staples you probably already have
If you’re tired of bland, dry chicken breast, this recipe is genuinely the fix. The brine keeps it moist, the parmesan crust keeps it interesting, and the whole thing comes together faster than ordering takeout.
Ingredients
For the Pickle Brine Marinade
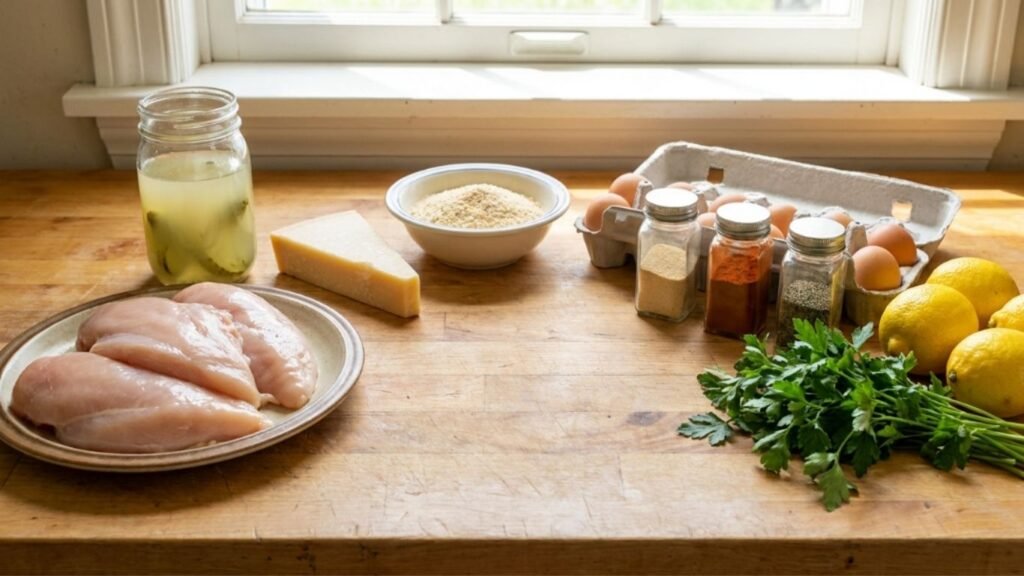
- 1 cup dill pickle juice (straight from the jar — don’t waste it!)
- 1 lb boneless, skinless chicken breasts (about 2 large breasts, pounded thin or butterflied)
- ½ teaspoon garlic powder
- ½ teaspoon onion powder
For the Parmesan Crust
- ½ cup grated parmesan cheese (finely grated works best for sticking)
- ½ cup Italian breadcrumbs (or panko for extra crunch)
- 1 teaspoon garlic powder
- 1 teaspoon smoked paprika
- ½ teaspoon black pepper
- ½ teaspoon dried oregano
- ¼ teaspoon cayenne pepper (optional, for heat)
For Cooking
- 2 tablespoons olive oil (for skillet/oven methods)
- Cooking spray (for air fryer method)
For Dipping (Optional but Recommended)
- Ranch dressing
- Honey mustard
- Garlic aioli
Ingredient Substitutions
| Original Ingredient | Easy Swap |
|---|---|
| Pickle juice | Buttermilk + 1 tsp apple cider vinegar |
| Parmesan cheese | Pecorino Romano or nutritional yeast (dairy-free) |
| Italian breadcrumbs | Panko, crushed crackers, or almond flour (keto) |
| Chicken breasts | Chicken thighs, tenders, or cutlets |
| Smoked paprika | Regular paprika or chili powder |
Gluten-free? Use gluten-free breadcrumbs or crushed pork rinds — they actually give an incredible crunch.
Keto/Low-carb? Swap the breadcrumbs for almond flour mixed with extra parmesan. It works beautifully.
Prep & Cook Time
| Time | |
|---|---|
| Marinating Time | 10–30 minutes (or overnight) |
| Prep Time | 10 minutes |
| Cook Time | 15–20 minutes |
| Total Time | ~30 minutes (active) |
| Servings | 4 servings |
| Difficulty | Easy |
Quick note on marinating: Even 10 minutes in the pickle brine makes a difference. But if you have time to let it sit overnight in the fridge, the flavor and tenderness will absolutely blow you away. I often toss the chicken in pickle juice the night before and just coat and cook it the next evening — takes 15 minutes total.
Kitchen Tools You’ll Need
- Large zip-lock bag or shallow dish (for marinating)
- Meat mallet or rolling pin (for pounding chicken thin)
- Two shallow bowls (for breading station)
- Paper towels
- Air fryer, oven-safe baking sheet, or large skillet
- Tongs
- Instant-read meat thermometer (highly recommend for perfect results)
You don’t need any fancy equipment. This is a genuine weeknight recipe that works with what most people already have.
Step-by-Step Instructions
Step 1: Marinate the Chicken in Pickle Brine
Place your chicken breasts in a zip-lock bag or shallow dish. Pour the pickle juice over them, add garlic powder and onion powder, seal the bag (or cover the dish), and let it marinate.
- Minimum: 10–15 minutes at room temperature
- Better: 1–4 hours in the fridge
- Best: Overnight in the fridge
The pickle juice will visibly change the texture of the chicken — it’ll look slightly more opaque. That’s the brine doing its job, breaking down the proteins and locking in moisture.
Step 2: Set Up Your Breading Station
While the chicken marinates (or after you pull it out), mix together your parmesan crust ingredients in a shallow bowl:
- Grated parmesan
- Breadcrumbs
- Garlic powder
- Smoked paprika
- Black pepper
- Dried oregano
- Cayenne (if using)
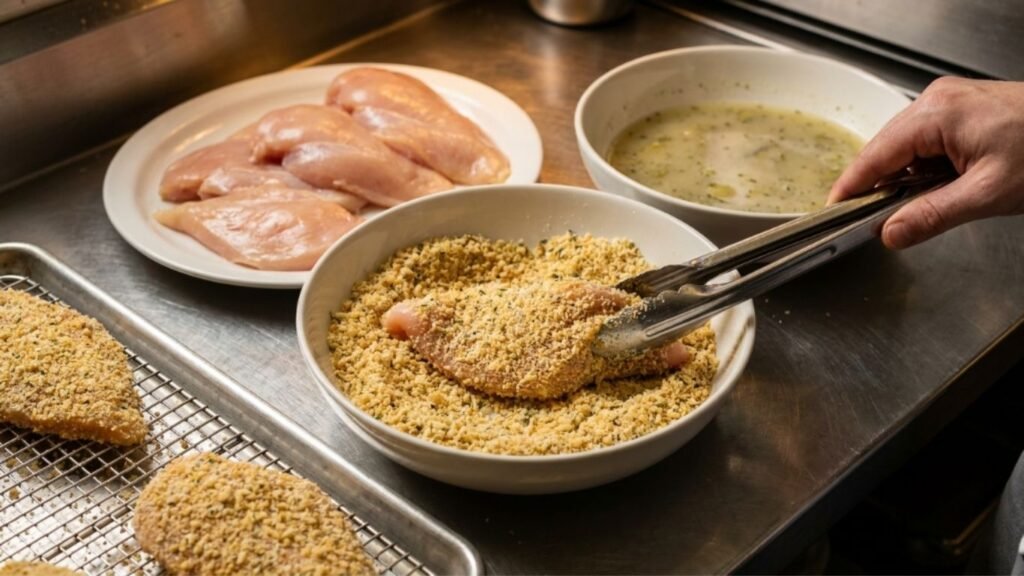
Mix everything well. In a separate shallow bowl, crack 1–2 eggs and beat them lightly. This is your egg wash to help the crust stick.
Step 3: Bread the Chicken
Remove the chicken from the pickle brine and pat it very dry with paper towels. This step matters more than people think — wet chicken means the crust won’t stick and won’t crisp properly.
Dip each piece of chicken into the egg wash, letting the excess drip off, then press it firmly into the parmesan breadcrumb mixture on both sides. Really press it in — you want full coverage.
Set the breaded chicken aside on a plate while you heat your cooking surface.
Step 4: Cook (See All Three Methods Below)
Choose your preferred cooking method from the section below. Cook until the internal temperature reaches 165°F (74°C) — a meat thermometer is the most reliable way to check this without cutting into the chicken and losing all those juices.
Step 5: Rest and Serve
Once cooked, let the chicken rest for 2–3 minutes before slicing. This lets the juices redistribute so you get a moist, tender bite rather than dry chicken that releases all its moisture the second you cut it.
Serve immediately for maximum crispiness.
Air Fryer, Oven & Skillet Methods
🔥 Air Fryer Method (My Favorite)
The air fryer makes this parmesan crusted chicken incredibly crispy with minimal oil — it’s honestly the best way to make it.
- Preheat your air fryer to 400°F (200°C) for 3 minutes.
- Lightly spray the air fryer basket with cooking spray.
- Place the breaded chicken in a single layer — don’t overlap.
- Spray the tops of the chicken lightly with cooking spray (this helps the crust brown evenly).
- Air fry for 10–12 minutes, flipping halfway through, until golden and crispy.
- Check internal temp: should be 165°F.
Cook time: 10–12 minutes
Result: Ultra-crispy, golden crust, super juicy inside
🍳 Skillet Method (Quick & Satisfying)
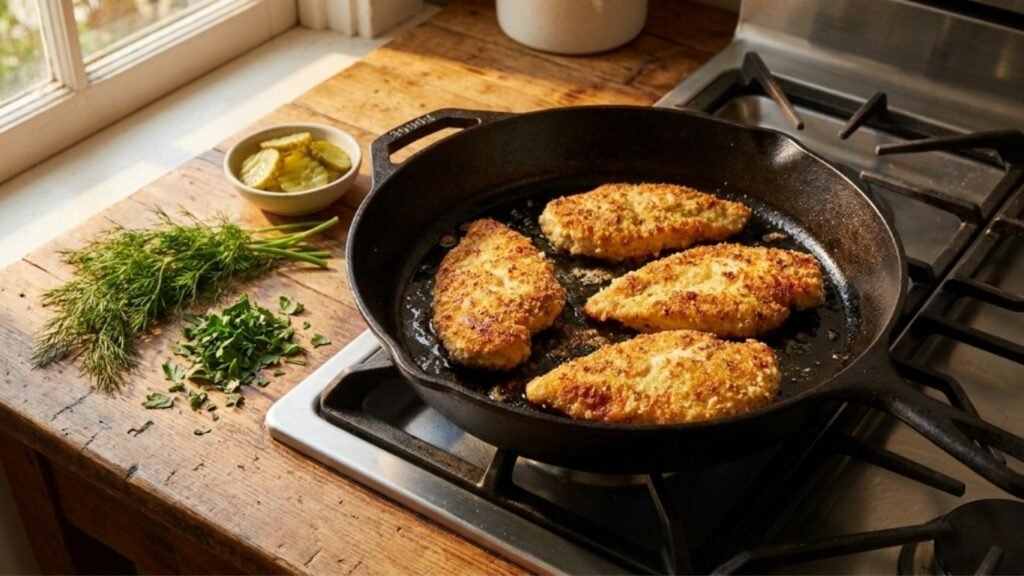
The skillet method gives you a beautifully pan-fried crust with rich, golden-brown color.
- Heat 2 tablespoons of olive oil in a large skillet over medium-high heat.
- Once the oil is hot and shimmering (not smoking), add the chicken.
- Cook for 5–6 minutes per side without moving it — let it develop a crust before flipping.
- If the parmesan starts to brown too quickly, reduce heat to medium.
- Check internal temp: 165°F.
Cook time: 10–12 minutes
Result: Rich, golden crust with crispy edges — great caramelized parmesan flavor
🍳 Oven Method (Hands-Off & Batch-Friendly)
The oven is ideal if you’re cooking for a crowd or want to walk away and not babysit the stove.
- Preheat oven to 425°F (220°C).
- Line a baking sheet with parchment paper or foil and set a wire rack on top.
- Place the breaded chicken on the wire rack (this allows air circulation for crispiness — without the rack, the bottom gets soggy).
- Drizzle or spray lightly with olive oil.
- Bake for 18–22 minutes, flipping once at the halfway point.
- For extra browning, broil on high for the last 2 minutes.
- Check internal temp: 165°F.
Cook time: 18–22 minutes
Result: Evenly cooked, consistently crispy — best for batch cooking
Expert Tips for the Best Results
1. Pound your chicken thin.
Thick chicken breasts take longer to cook, which means your crust can burn before the inside is done. Aim for about ¾-inch thickness. A quick pound with a mallet or rolling pin (through a plastic bag) solves this completely.
2. Pat the chicken very dry before breading.
I already mentioned this, but it’s worth repeating. Moisture is the enemy of crispiness. After the brine, really blot that chicken with paper towels.
3. Use finely grated parmesan, not shredded.
The powdery, finely grated parmesan (like the kind in the green can, or freshly grated on a microplane) sticks to the chicken much better than shredded parmesan and creates a more uniform, crispier crust.
4. Press the coating firmly onto the chicken.
Don’t just dip and set it down — really press that parmesan mixture into both sides of the chicken so it adheres well.
5. Don’t skip the egg wash.
The egg is what makes the crust stick. Some people try to skip it, and then their coating falls off in the pan. Don’t skip it.
6. Use a meat thermometer.
I know it sounds fussy, but it takes two seconds and guarantees you never overcook (dry) or undercook (unsafe) your chicken. 165°F is your target.
7. Let it rest before cutting.
Two minutes of resting = dramatically juicier chicken. It’s worth the wait.
Common Mistakes to Avoid
❌ Not drying the chicken before breading
Wet chicken = soggy crust that slides right off. Always pat dry.
❌ Overcrowding the pan or air fryer
If the pieces are touching, steam builds up and the crust won’t crisp. Cook in batches if needed.
❌ Using coarse shredded parmesan
It doesn’t stick as well and can clump unevenly. Fine-grated parmesan is the move.
❌ Flipping too early in the skillet
If it’s sticking when you try to flip, it’s not ready. A properly crisped crust releases naturally from the pan — give it another minute.
❌ Skipping the resting step
Cutting into chicken the second it comes out means all the juices run out. Rest it for a couple of minutes.
❌ Marinating for too long in pickle brine
While pickle brine is a gentler marinade than pure acid, don’t marinate for more than 24 hours — the chicken texture can become mushy if left too long.
Flavor Variations
One of the best things about this easy chicken recipe is how easy it is to riff on. Here are some variations worth trying:
🌶️ Spicy Buffalo Parmesan Pickle Chicken
Add 1 tablespoon of hot sauce to the pickle brine marinade and increase the cayenne in the crust. Serve with blue cheese dressing.
🍋 Lemon Herb Parmesan Chicken
Add lemon zest and fresh thyme to the parmesan crust. Bright, fresh, and perfect for spring/summer meals.
🧄 Garlic Parmesan Ranch
Mix 1 teaspoon of dry ranch seasoning into the breadcrumb mixture. Serve with extra ranch for dipping. Kids absolutely love this version.
🌿 Italian Style
Use Italian seasoning generously, add a pinch of red pepper flakes, and serve over pasta with marinara sauce — it becomes a quick parmesan chicken pasta dish.
🥓 Bacon Parmesan Pickle Chicken
Add 2 tablespoons of finely crumbled bacon bits to the parmesan crust. Over-the-top, but so worth it.
Keto/Low-Carb Version
Replace breadcrumbs with almond flour and extra parmesan. Same pickle brine, same process. You won’t miss the breadcrumbs.
Serving Suggestions
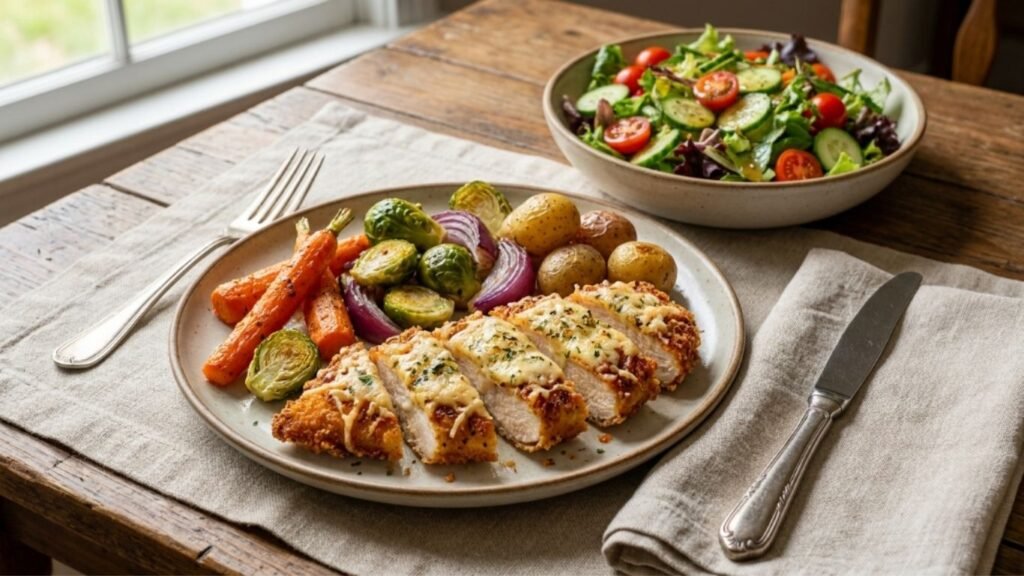
This crispy parmesan pickle chicken is versatile enough to work as a standalone dinner, a salad topper, or part of a bigger spread. Here are some of my favorite ways to serve it:
For a balanced plate:
- Roasted vegetables (zucchini, broccoli, asparagus)
- Garlic mashed potatoes or cauliflower mash
- A simple green salad with lemon vinaigrette
- Steamed rice or quinoa
For a meal prep situation:
Slice the cooked chicken and use it as the protein base for bowls throughout the week. If you’re into building nutrient-dense bowls, check out these Nutritious Green Goddess Bowls — the chicken pairs beautifully with that flavor profile.
For a quick lunch:
Slice it thin and use it in wraps, sandwiches, or over greens. It holds up really well cold, which makes it great for packed lunches. If you’re always scrambling for ideas during the workweek, 5 Quick Lunch Recipes for Busy Days has some great pairings that work alongside this chicken.
For a dinner party:
Cut into strips and serve as a chicken tender appetizer with a variety of dipping sauces. It looks impressive with almost zero extra effort.
Storage & Reheating Tips
Storing Leftovers
Let the chicken cool completely before storing. Place in an airtight container and refrigerate for up to 4 days. If you’re stacking pieces, put parchment paper between them to prevent the crust from getting damaged.
Can you freeze it? Yes! Freeze fully cooked and cooled chicken in a freezer-safe container for up to 2 months. Freeze in a single layer first (on a baking sheet), then transfer to a container once solid.
Reheating Without Losing the Crunch
The microwave is the enemy of crispy chicken. Here’s how to actually reheat it well:
Air fryer (best method):
375°F for 4–5 minutes. Comes out almost as crispy as fresh.
Oven:
Preheat to 400°F, place chicken on a wire rack over a baking sheet, heat for 8–10 minutes. Works really well.
Skillet:
Medium heat with a tiny bit of oil, a few minutes per side. Also great.
Avoid: The microwave if you can help it. If you must use it, do short 30-second bursts and accept that the crust will be softer.
Estimated Nutrition (Per Serving)
Based on 4 servings, using chicken breast, air fryer method, no dipping sauce.
| Nutrient | Amount |
|---|---|
| Calories | ~320 kcal |
| Protein | ~42g |
| Fat | ~10g |
| Saturated Fat | ~3g |
| Carbohydrates | ~12g |
| Fiber | ~1g |
| Sodium | ~680mg |
| Calcium | ~180mg |
Nutrition values are estimates and will vary based on exact ingredients, portion sizes, and cooking method.
This is genuinely a high-protein dinner — 42 grams of protein per serving is excellent, making it a solid choice if you’re focused on weight management, muscle building, or just staying full longer. If you’re building a high-protein meal plan, you might also love these 10 High Protein Lunch Bowls for Weight Loss for more ideas that fit a similar nutritional profile.
Frequently Asked Questions
1. Does the chicken actually taste like pickles?
Not in an overwhelming way, no. The pickle brine adds a mild tanginess and a subtle savory depth — it makes the chicken taste better and more interesting, not like you bit into a pickle. Most people can’t even identify the source; they just know the chicken tastes really good. If you’re nervous, start with a 15-minute brine and work your way up.
2. Can I use chicken thighs instead of chicken breasts?
Absolutely. Boneless, skinless chicken thighs are actually more forgiving than breasts because they’re naturally fattier and harder to overcook. They’ll need an extra 2–3 minutes of cook time depending on their size. The end result is juicy, flavorful, and just as crispy.
3. Can I make this ahead of time?
Yes, in two ways. First, you can marinate the chicken in pickle brine the night before — this actually improves the flavor. Second, you can cook the chicken ahead and reheat it (see the reheating section). What you shouldn’t do is bread the chicken and leave it sitting uncooked for hours — the coating gets soggy. Bread it right before cooking.
4. What type of pickle juice works best?
Classic dill pickle juice is the gold standard for this recipe. It has the right balance of salt, vinegar, and dill. Bread-and-butter pickle juice is sweeter and gives a slightly different flavor (not bad, just different). Spicy pickle juice is also fantastic if you like heat. Avoid anything labeled “cocktail” pickles or heavily sweetened varieties.
5. Is this recipe actually kid-friendly?
Yes — very much so. The pickle flavor is subtle once cooked, and the crispy parmesan crust makes it look and feel like a chicken tender, which most kids love. If you’re worried, leave out the cayenne pepper and serve it with a dipping sauce they enjoy (ranch is always a winner).
6. Can I make this dairy-free?
Yes. Replace the parmesan with nutritional yeast (about ⅓ cup — it’s naturally nutty and savory) and use your favorite dairy-free binder in place of the egg wash. The texture won’t be identical, but it’s still very tasty. Many people who are lactose intolerant can also handle hard aged parmesan just fine since most of the lactose is removed during aging.
7. Why is my parmesan crust falling off during cooking?
Three likely culprits: the chicken wasn’t dry enough before breading, you skipped the egg wash, or you flipped it too soon. Make sure the chicken is well-patted, you use an egg wash to bind the coating, and you wait until the crust naturally releases from the pan before flipping.
Flavor Variations for Different Diets
If you’re working on eating more balanced but don’t want boring food, this recipe fits perfectly into a variety of lifestyles. And if you’re looking to shake up your weekly rotation beyond chicken, check out these 6 Healthy Lunch Ideas That Aren’t Salads — they complement this kind of cooking style really well.
Key Takeaways
Here’s the quick summary if you want to save this for later:
- Pickle brine is the secret to juicy, flavorful chicken — minimum 10–15 minutes, overnight is best
- Pat the chicken completely dry before breading — this is non-negotiable for crispiness
- Fine-grated parmesan sticks better than shredded and creates a superior crust
- Air fryer at 400°F for 10–12 minutes is the fastest and crispiest cooking method
- Always check for 165°F internal temperature using a meat thermometer
- Rest the chicken 2–3 minutes before slicing for maximum juiciness
- Leftovers reheat beautifully in the air fryer or oven — skip the microwave
- Works for meal prep, quick weeknight dinners, and even entertaining
- Approximately 42g protein per serving — excellent for high-protein meal goals
- Easy to customize with different spices, cheeses, and coatings
Conclusion
If there’s one recipe that I’d tell every home cook to try at least once, this crispy parmesan pickle chicken is genuinely near the top of that list. It’s fast, it’s satisfying, it’s packed with flavor, and once you understand why the pickle brine works, you’ll start using it for other chicken dishes too.
The whole thing takes 30 minutes on a regular weeknight, tastes like something you’d order at a restaurant, and uses ingredients that cost almost nothing extra if you’re already buying pickles. That’s a hard combination to beat.
Give it a try this week — especially the overnight brine version. I’d be genuinely surprised if it doesn’t become a regular in your rotation.
Happy cooking! 🧀🥒🍗