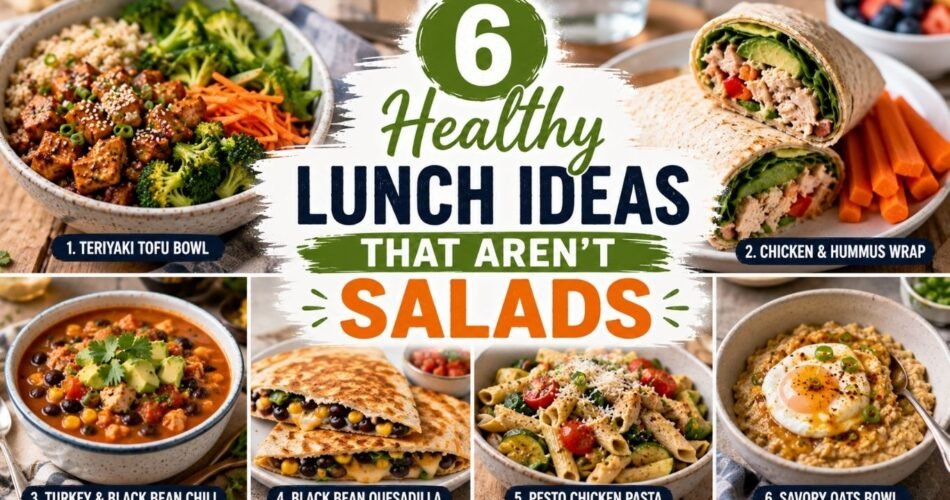
Let’s be honest — salads get old fast. Sure, they have their place, but if you’re someone who eats lunch at your desk, feeds a family on a budget, or just wants something that actually keeps you full until dinner, a bowl of leafy greens rarely cuts it.
The good news? Eating healthy at lunch doesn’t mean you’re stuck choosing between a sad Caesar and a wilted spinach bowl. There are so many satisfying, nutritious lunch options that are packed with protein, fiber, and real flavor — no croutons required.
I’ve been cooking and meal prepping for years, and these six recipes are ones I genuinely rotate through on a regular basis. They’re simple, they use real grocery store ingredients, and they hold up well if you’re packing them ahead. Whether you’re trying to eat cleaner, lose a little weight, or just break out of your lunch rut, there’s something here for you.
Why Healthy Lunches Matter More Than You Think
Most people focus on breakfast and dinner and treat lunch like an afterthought. But your midday meal plays a huge role in your energy levels, focus, and how much you eat later in the day.
A well-balanced lunch should include:
- Lean protein — keeps you full and supports muscle
- Complex carbs — give you steady energy without the crash
- Healthy fats — help absorb nutrients and keep hunger at bay
- Fiber — supports digestion and blood sugar balance
These six recipes check all those boxes, and none of them are salads.
1. Turkey and Avocado Lettuce Wraps (No, Not a Salad)
Why This One Works
Before you say it — lettuce wraps are not salads. You’re using lettuce as a vehicle, not a base, and the filling is where all the action is. This lunch is high in protein, low in refined carbs, and genuinely satisfying.
Ground turkey is one of the leanest proteins you can cook with, and avocado adds healthy monounsaturated fats that keep you full without spiking your blood sugar. It comes together in under 20 minutes and tastes like something you’d pay $14 for at a fast-casual restaurant.
Prep Time: 10 minutes
Cook Time: 10 minutes
Total Time: 20 minutes
Servings: 2
Key Ingredients
- 250g (½ lb) ground turkey
- 1 ripe avocado, sliced or mashed
- 1 tablespoon low-sodium soy sauce or tamari
- 1 teaspoon garlic powder
- ½ teaspoon ginger (fresh or powdered)
- 1 teaspoon sesame oil
- ½ cup shredded carrots
- ¼ cup diced water chestnuts (optional but adds great crunch)
- 8 large butter lettuce or romaine leaves
- Sriracha or chili flakes to taste
- Fresh lime juice
Step-by-Step Instructions
- Heat a non-stick pan over medium-high heat. Add a tiny drizzle of sesame oil.
- Add ground turkey and break it apart with a wooden spoon. Cook for 6–7 minutes until fully browned.
- Stir in soy sauce, garlic powder, ginger, and water chestnuts. Cook for another 2 minutes.
- Remove from heat and let cool slightly.
- Lay out your lettuce leaves on a plate or flat surface.
- Spoon the turkey mixture into each leaf.
- Top with shredded carrots, sliced avocado, a squeeze of lime, and as much sriracha as you can handle.
- Fold and eat immediately, or pack the filling separately for meal prep.
Nutrition Highlights (Per Serving)
| Nutrient | Approx. Amount |
|---|---|
| Calories | ~320 |
| Protein | ~28g |
| Fat | ~15g |
| Carbs | ~12g |
| Fiber | ~5g |
Meal Prep Tips
Cook a double batch of the turkey filling and store it in an airtight container in the fridge for up to 4 days. Keep the lettuce leaves, avocado, and toppings separate until you’re ready to eat. Avocado browns quickly, so slice it fresh each day or store with the pit and a squeeze of lime juice.
Healthy Substitutions
- Turkey → Ground chicken or extra-firm tofu (crumbled and seasoned)
- Soy sauce → Coconut aminos for a lower-sodium, soy-free option
- Butter lettuce → Collard green leaves for a sturdier wrap
Serving Suggestions
Pair these with a small cup of miso soup or a handful of edamame on the side for a complete, protein-rich lunch. If you need more carbs (especially if you’re active), serve over a small bed of brown rice instead of in lettuce.
2. Chickpea and Sweet Potato Power Bowl
Why This One Works
This bowl is a nutritional powerhouse. Chickpeas are loaded with plant-based protein and fiber, sweet potatoes bring complex carbs and beta-carotene, and the tahini dressing pulls it all together with healthy fats and a rich, nutty flavor.
It’s also 100% vegan and naturally gluten-free, which means it works for a wide range of dietary needs. I make a big batch of the roasted ingredients on Sunday and eat this three days in a row without getting bored — the flavors actually get better as they sit.
If you’re looking for more ideas in this style, these 10 High Protein Lunch Bowls for Weight Loss are worth bookmarking too.
Prep Time: 10 minutes
Cook Time: 25 minutes
Total Time: 35 minutes
Servings: 2
Key Ingredients
- 1 can (400g) chickpeas, drained and rinsed
- 1 large sweet potato, cubed (no need to peel)
- 1 tablespoon olive oil
- 1 teaspoon smoked paprika
- ½ teaspoon cumin
- Salt and pepper to taste
- ½ cup cooked quinoa or brown rice
For the Tahini Dressing:
- 2 tablespoons tahini
- 1 tablespoon lemon juice
- 1 teaspoon maple syrup
- 1–2 tablespoons warm water (to thin)
- 1 small garlic clove, grated
- Pinch of salt
Step-by-Step Instructions
- Preheat your oven to 200°C (400°F).
- Pat chickpeas dry with a paper towel — this is the key to getting them crispy.
- Toss chickpeas and sweet potato cubes with olive oil, smoked paprika, cumin, salt, and pepper on a large baking sheet.
- Spread everything in a single layer (don’t overcrowd — that’s how you get steam instead of roast).
- Roast for 25–30 minutes, flipping once halfway through, until the sweet potato is tender and the chickpeas are golden and slightly crispy.
- While that roasts, whisk together all dressing ingredients until smooth. Add more water if it’s too thick.
- Build your bowl: start with quinoa or rice, add the roasted chickpeas and sweet potato, drizzle generously with tahini dressing.
Nutrition Highlights (Per Serving)
| Nutrient | Approx. Amount |
|---|---|
| Calories | ~410 |
| Protein | ~16g |
| Fat | ~14g |
| Carbs | ~55g |
| Fiber | ~12g |
Meal Prep Tips
Roast a double or triple batch and store in the fridge for up to 5 days. Keep the dressing in a small jar — it actually keeps well for a week and works on everything. Reheat the bowl components in a microwave for 90 seconds before adding dressing.
Healthy Substitutions
- Chickpeas → White beans or lentils for a different texture
- Sweet potato → Butternut squash or beets
- Tahini dressing → Greek yogurt with lemon and herbs if you want a creamier, higher-protein option
Serving Suggestions
Add a handful of fresh herbs on top — parsley or cilantro work really well here. A few pumpkin seeds or walnuts add extra crunch and healthy fats without much effort.
3. Egg and Veggie Muffin Cups
Why This One Works
These little egg cups are one of the most practical healthy lunches I know. They’re high in protein, low in carbs, incredibly customizable, and you can make 12 at once and eat them all week. They reheat in under a minute and taste just as good on day four as they do fresh out of the oven.
Eggs are one of the most nutrient-dense foods on the planet — they provide complete protein, vitamin B12, choline, and healthy fats. Pair them with vegetables and you’ve got a genuinely balanced meal.
Prep Time: 10 minutes
Cook Time: 20 minutes
Total Time: 30 minutes
Servings: 3–4 (makes 12 muffin cups)
Key Ingredients
- 6 large eggs
- 4 egg whites (adds protein, keeps them light)
- ½ cup diced bell peppers (any color)
- ½ cup chopped baby spinach
- ¼ cup diced red onion
- ¼ cup cherry tomatoes, halved
- ¼ cup crumbled feta cheese
- Salt, black pepper, and dried oregano to taste
- Cooking spray or a little olive oil
Step-by-Step Instructions
- Preheat oven to 180°C (350°F). Grease a 12-cup muffin tin well with cooking spray.
- In a large bowl, whisk together eggs and egg whites until combined. Season with salt, pepper, and oregano.
- Divide the diced vegetables evenly among the muffin cups — fill about halfway.
- Pour the egg mixture over the vegetables, filling each cup about ¾ full.
- Sprinkle feta over the top of each cup.
- Bake for 18–22 minutes, until the eggs are set and the tops are just slightly golden.
- Let cool in the tin for 5 minutes before removing. Run a butter knife around the edges if they stick.
Nutrition Highlights (Per 3 Muffin Cups)
| Nutrient | Approx. Amount |
|---|---|
| Calories | ~210 |
| Protein | ~18g |
| Fat | ~12g |
| Carbs | ~5g |
| Fiber | ~1g |
Meal Prep Tips
These are literally made for meal prep. Store in an airtight container in the fridge for up to 5 days. To reheat, microwave for 45–60 seconds. They also freeze well — freeze in a zip-lock bag and thaw overnight in the fridge.
Healthy Substitutions
- Feta → Goat cheese or skip the cheese entirely
- Add turkey sausage or diced ham for extra protein
- Swap spinach for kale — just chop it finely so it cooks through
Serving Suggestions
Eat 3 muffin cups with a slice of whole grain toast and a piece of fruit for a complete lunch. Or pack them with a small container of hummus and some cucumber slices for an easy, no-fuss work lunch.
4. Lemon Herb Salmon with Roasted Veggies
Why This One Works
Salmon is one of the best foods you can eat for overall health. It’s rich in omega-3 fatty acids, which reduce inflammation, support heart health, and even improve brain function. Paired with roasted vegetables, this lunch is filling without feeling heavy, and it takes surprisingly little effort to make.
This is the kind of lunch that sounds fancy but comes together in about 30 minutes with minimal cleanup — especially if you roast everything on the same sheet pan.
For more ideas that are this filling and nutritious, check out these High-Protein Lunch Ideas that go beyond the basics.
Prep Time: 10 minutes
Cook Time: 20 minutes
Total Time: 30 minutes
Servings: 2
Key Ingredients
- 2 salmon fillets (about 150g each)
- 1 cup broccoli florets
- 1 cup zucchini, sliced into half-moons
- 1 cup cherry tomatoes
- 2 tablespoons olive oil
- Zest and juice of 1 lemon
- 2 garlic cloves, minced
- 1 teaspoon dried thyme or fresh dill
- Salt and pepper to taste
Step-by-Step Instructions
- Preheat oven to 200°C (400°F). Line a baking sheet with parchment paper.
- Toss broccoli, zucchini, and cherry tomatoes with 1 tablespoon of olive oil, salt, and pepper. Spread on one side of the baking sheet.
- Place salmon fillets on the other side of the tray.
- Mix together remaining olive oil, lemon zest, lemon juice, garlic, and thyme. Brush generously over the salmon.
- Season salmon with a little salt and pepper.
- Roast everything together for 18–22 minutes, until salmon flakes easily with a fork and vegetables are slightly caramelized at the edges.
- Serve immediately, with extra lemon on the side.
Nutrition Highlights (Per Serving)
| Nutrient | Approx. Amount |
|---|---|
| Calories | ~380 |
| Protein | ~34g |
| Fat | ~22g |
| Carbs | ~10g |
| Fiber | ~4g |
Meal Prep Tips
Cook the salmon fresh when possible — reheated fish can be tricky. That said, if you’re okay with eating it cold, flaked salmon over the reheated veggies actually works really well. Alternatively, cook the veggies ahead and cook salmon fresh in a pan in 6 minutes.
Healthy Substitutions
- Salmon → Trout, cod, or tilapia for a milder flavor and lower cost
- Add a grain: serve over farro, quinoa, or cauliflower rice to bulk it up
- Dairy-free and gluten-free as written — no changes needed
Serving Suggestions
A small wedge of crusty sourdough on the side pairs beautifully with the roasted tomatoes. Or serve with a spoonful of tzatziki for a Mediterranean-style plate that feels like you ordered from a nice restaurant.
5. Black Bean and Corn Quesadillas (Made Healthier)
Why This One Works
Quesadillas get a bad reputation because the restaurant versions are usually swimming in cheese and sour cream. But made at home with whole wheat tortillas, fiber-rich black beans, and a light hand with the cheese, they’re actually a solid, balanced lunch.
Black beans are an underrated nutritional gem — one cup has about 15 grams of protein and 15 grams of fiber. They’re also budget-friendly, shelf-stable, and incredibly versatile.
Prep Time: 5 minutes
Cook Time: 10 minutes
Total Time: 15 minutes
Servings: 2
Key Ingredients
- 4 small whole wheat tortillas (6–8 inch)
- 1 can (400g) black beans, drained and rinsed
- ½ cup frozen or canned corn, drained
- ½ cup shredded reduced-fat cheddar or Monterey Jack cheese
- ¼ red onion, finely diced
- 1 teaspoon cumin
- ½ teaspoon chili powder
- Salt to taste
- Cooking spray
- Plain Greek yogurt for serving (instead of sour cream)
- Fresh salsa or pico de gallo
Step-by-Step Instructions
- In a bowl, mix black beans, corn, red onion, cumin, chili powder, and salt. Give it a quick mash with a fork — you want some texture, not a smooth paste.
- Heat a non-stick skillet or griddle over medium heat. Spray lightly with cooking spray.
- Place one tortilla in the pan. Spread half the bean mixture over one half of the tortilla.
- Sprinkle cheese over the beans, then fold the tortilla in half.
- Cook for 2–3 minutes per side until golden and crispy and the cheese is melted.
- Repeat with the remaining tortillas.
- Slice into wedges and serve with Greek yogurt and fresh salsa.
Nutrition Highlights (Per Serving – 2 Quesadillas)
| Nutrient | Approx. Amount |
|---|---|
| Calories | ~390 |
| Protein | ~22g |
| Fat | ~10g |
| Carbs | ~52g |
| Fiber | ~14g |
Meal Prep Tips
The bean and corn filling keeps in the fridge for up to 5 days — make a big batch at the start of the week. Quesadillas are best made fresh (they get soggy when stored assembled), but with the filling ready to go, you can have lunch on the table in under 5 minutes.
Healthy Substitutions
- Whole wheat tortillas → Corn tortillas for a gluten-free option
- Add shredded chicken to boost protein even further
- Skip the cheese and add a drizzle of tahini or hummus for a dairy-free version
Serving Suggestions
These are great with a side of sliced avocado or a small cup of tomato soup. If you’re cooking for kids, cut them into triangles and serve with mild salsa — they’ll disappear in minutes.
6. Miso Soup with Tofu, Edamame, and Soba Noodles
Why This One Works
This is the lunch I make when I want something warm, comforting, and light all at once. Soba noodles are made from buckwheat, which is naturally gluten-free and higher in protein than regular pasta. Tofu adds plant-based protein, edamame packs in extra fiber and amino acids, and the miso broth is rich in probiotics that support gut health.
It sounds restaurant-level, but it’s genuinely simple to pull together. If you’ve ever made instant ramen, you can make this.
This is also a great option if you’re looking for more ideas — 9 Easy & Tasty Lunch Ideas for Busy Days has a similar philosophy of quick, real food that doesn’t require much effort.
Prep Time: 5 minutes
Cook Time: 15 minutes
Total Time: 20 minutes
Servings: 2
Key Ingredients
- 100g (about 3.5 oz) dry soba noodles
- 200g firm tofu, cubed
- ½ cup frozen edamame (shelled)
- 3 tablespoons white miso paste
- 3 cups low-sodium vegetable or chicken broth
- 1 cup water
- 1 tablespoon low-sodium soy sauce or tamari
- 1 teaspoon sesame oil
- 2 green onions, thinly sliced
- 1 sheet nori (dried seaweed), torn into small pieces
- Optional: sliced shiitake mushrooms, bok choy
Step-by-Step Instructions
- Cook soba noodles according to package directions (usually 4–5 minutes). Drain and rinse under cold water to stop cooking and prevent sticking. Set aside.
- In a medium saucepan, bring broth and water to a gentle simmer over medium heat.
- Add edamame and shiitake mushrooms if using. Simmer for 3–4 minutes.
- Add tofu cubes and soy sauce. Simmer for another 2 minutes.
- Remove the pot from heat. Spoon a ladle of hot broth into a small bowl and whisk in the miso paste until fully dissolved — don’t add miso directly to boiling liquid or you’ll destroy its beneficial properties.
- Stir the dissolved miso back into the pot.
- Divide the soba noodles between two bowls. Pour the miso broth and toppings over the noodles.
- Drizzle with sesame oil, top with green onions and nori, serve immediately.
Nutrition Highlights (Per Serving)
| Nutrient | Approx. Amount |
|---|---|
| Calories | ~340 |
| Protein | ~22g |
| Fat | ~9g |
| Carbs | ~42g |
| Fiber | ~6g |
Meal Prep Tips
Store the broth and noodles separately to prevent the noodles from soaking up all the liquid. The broth keeps in the fridge for 4 days. Reheat the broth on the stovetop or microwave, then pour over fresh or pre-cooked noodles. Add green onions and nori fresh each time.
Healthy Substitutions
- Soba noodles → Brown rice noodles or zucchini noodles for lower carbs
- Tofu → Shrimp or shredded rotisserie chicken for a non-vegan version
- Add a soft-boiled egg on top for extra protein and richness
Serving Suggestions
A few kimchi on the side makes this lunch feel like a full Korean-Japanese fusion bowl. Or add a sprinkle of sesame seeds and a drizzle of chili oil for a little heat.
Frequently Asked Questions
1. Are these healthy lunches good for weight loss?
Yes — all six of these recipes are built around whole foods, lean protein, fiber, and minimal processed ingredients. They’re filling without being calorie-heavy, which is key for sustainable weight management. The egg muffin cups and turkey lettuce wraps are particularly low in carbs if that’s your focus.
2. Can I make all of these gluten-free?
Almost. The chickpea bowl, salmon with veggies, and egg muffin cups are already naturally gluten-free. For the quesadillas, swap to corn tortillas. For the miso soup, use certified gluten-free soba noodles or rice noodles (regular soba often contains wheat). For the turkey wraps, use coconut aminos instead of soy sauce.
3. Which of these is the best for meal prep beginners?
The egg muffin cups, hands down. You make one batch, pop them in the fridge, and your lunches are done for the next 4–5 days. No decisions, no extra cooking. They’re also one of the most kid-friendly options if you’re packing lunch for multiple people.
4. I’m vegetarian — which recipes work for me?
The chickpea and sweet potato power bowl, the egg and veggie muffin cups, the black bean quesadillas, and the miso soup with tofu are all vegetarian. The miso soup can also easily be made fully vegan by using vegetable broth and skipping the egg topping.
5. How do I make these lunches more filling if I’m very active?
Add a grain base to any of these — brown rice, farro, or quinoa adds complex carbs and extra calories without compromising the nutritional quality. You can also increase portion sizes of the protein component, or add a healthy fat like a spoonful of nut butter, some avocado, or a handful of nuts on the side.
6. Can kids eat these lunches?
Most of them, yes. The quesadillas and egg muffin cups are particularly kid-friendly. For the turkey wraps, you might skip the sriracha. The miso soup may need a small tweak — kids tend to be fussier about tofu, so you could substitute with shredded chicken. The chickpea bowl is a hit with most kids once they taste the tahini dressing.
7. What if I don’t have time to cook lunch from scratch every day?
That’s exactly what meal prep is for. Pick one or two of these recipes on Sunday, batch-cook the components, and store everything in portions. Most of these take 30 minutes or less on their busiest day, and when components are prepped ahead, you can assemble lunch in under 5 minutes.
Conclusion
Eating a healthy lunch isn’t about discipline or deprivation — it’s about finding recipes you actually want to eat. When your food is satisfying, flavorful, and genuinely nourishing, you don’t need willpower to stick to it.
These six lunch ideas are proof that healthy eating can be practical, delicious, and sustainable without relying on salads. Whether you gravitate toward the crispy quesadillas, the warming miso soup, or the 5-day-friendly egg muffin cups, there’s a real meal here for every kind of week.
Start with one, get comfortable, and slowly add more to your rotation. Your future self — the one who isn’t hitting the vending machine at 3pm — will thank you.