I’ll be honest — I almost didn’t bring these to my friend Dana’s backyard party last July. I’d made them twice already that week during testing, and by that point I was questioning every single decision I’d made. The filling looked too loose. The color felt too orange. I was convinced they were going to collapse into a puddle the second I sliced them.
They didn’t. They were perfect. Three people asked for the recipe before I’d even put the tray down.
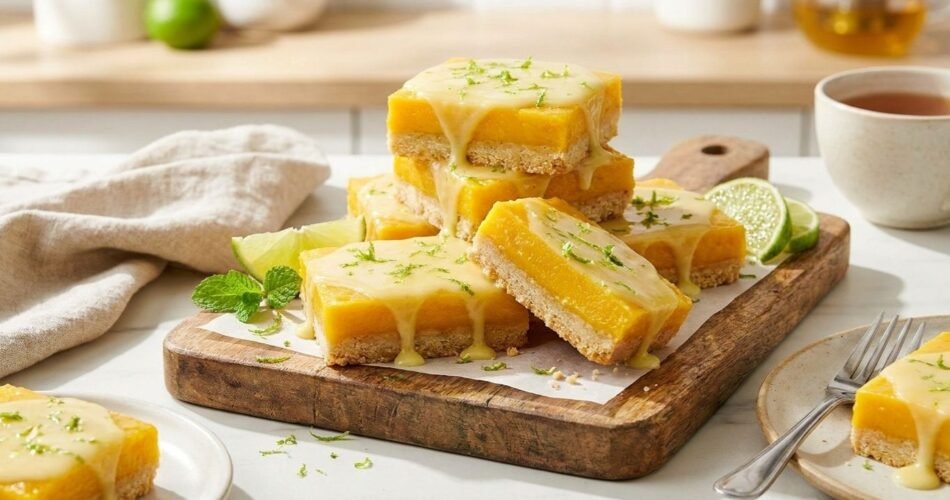
Mango bars with lime glaze sit somewhere between a lemon bar and a tropical dream. The filling is custardy and rich, deeply mango-forward, with a shortbread base that crumbles just enough without falling apart. The lime glaze on top isn’t just decoration — it cuts the sweetness and adds a hit of brightness that ties the whole thing together.
These are for you if you want a make-ahead dessert that actually gets better overnight. Great for potlucks, bake sales, or honestly, just your own Tuesday afternoon.
Why These Mango Bars Actually Work
A lot of mango bar recipes out there rely on canned puree and crossed fingers. Here’s what makes this version consistently great.
The mango concentration matters. We briefly cook the mango puree on the stovetop before it ever touches the filling. This drives off excess moisture and intensifies the flavor. Raw puree can make your filling weep or set too softly.
Cold butter in the shortbread crust — always. Warm or melted butter gives you a greasy, dense base. Cold butter, worked into the flour quickly, creates tiny pockets of fat that bake into a tender, slightly flaky crust that can actually hold up to a wet filling.
The eggs go in last. This prevents them from scrambling when you add hot mango puree. You whisk your eggs separately, temper them slightly with a spoonful of the warm mixture, then combine. That step alone saved me from a curdled disaster during my first attempt.
Lime zest in both the filling AND the glaze. One hit of lime is nice. Two hits creates this layered citrus effect where the top note is sharp and fresh and the undertone is more mellow. It’s the difference between “good” and “wait, what’s in this?”
Room temperature baking time isn’t optional. These bars need to rest at room temperature for at least 30 minutes after they come out of the oven, then go into the fridge to fully set. Cutting them while still warm is the number-one reason bars fall apart. I’ve made this mistake. Don’t make this mistake.
Key Ingredients & Smart Substitutions
Fresh or frozen mango — Ripe Ataulfo (champagne) mangoes are ideal; they’re silky, less fibrous, and deeply sweet. Frozen mango works great here — just thaw completely and pat dry before pureeing. Skip canned mango puree if you can; it’s often too thin and sweetened.
All-purpose flour — Used in both the crust and filling for structure. Swap 1:1 with a gluten-free all-purpose blend (like Bob’s Red Mill) for a GF version — the crust texture will be slightly more crumbly but still delicious.
Unsalted cold butter — You want full control over the salt level. Always go unsalted and add your own.
Eggs — They set the custard filling. No solid substitutes here for the same texture; this isn’t the recipe to make vegan without significant reworking.
Fresh lime juice & zest — Bottled lime juice is a hard no. Fresh juice is brighter, more complex, and doesn’t have that slightly bitter aftertaste.
Powdered sugar — Used in the crust, filling, and glaze. Sifting it matters — lumpy glaze looks sloppy and doesn’t drizzle cleanly.
Turmeric (a small pinch, optional) — This is my little trick. A tiny amount deepens the golden color of the filling without adding any flavor. Completely optional, but it makes the bars look gorgeous.
Step-by-Step Instructions
Step 1: Make the Shortbread Crust
Preheat your oven to 350°F (175°C). Line an 8×8-inch baking pan with parchment paper, leaving overhang on two sides (this is your handle for lifting the bars out later).
In a large bowl, whisk together 1 cup all-purpose flour, ¼ cup powdered sugar, and ¼ tsp fine sea salt. Add ½ cup (1 stick) cold unsalted butter, cut into small cubes. Work the butter in with your fingertips until the mixture looks like coarse, damp sand. Some pea-sized pieces of butter are fine — even good.
Press the mixture firmly and evenly into the bottom of your prepared pan. Use the flat bottom of a measuring cup to really pack it down.
Bake for 18–20 minutes, until the edges are just starting to turn golden. Remove and let it cool slightly while you make the filling.
Chef’s Note: Don’t skip the blind bake. A pre-baked crust creates a moisture barrier so the filling doesn’t make the bottom soggy. A soggy bottom is the enemy.
Step 2: Concentrate the Mango Puree
Add 1½ cups fresh or thawed mango chunks to a blender and puree until completely smooth. You should get about 1 cup of puree.
Pour it into a small saucepan over medium heat. Cook, stirring frequently, for 5–7 minutes until slightly thickened and reduced by about 20%. It should coat the back of a spoon.
Remove from heat and let it cool for 10 minutes.
Chef’s Note: Don’t rush the cooling. Adding hot puree directly to eggs — even with tempering — can scramble them. Give it those 10 minutes.
Step 3: Make the Mango Filling
In a medium bowl, whisk together 3 large eggs, ¾ cup granulated sugar, 3 tbsp all-purpose flour, 2 tbsp fresh lime juice, 1 tsp lime zest, and a pinch of salt.
Add one spoonful of the warm (not hot) mango puree into the egg mixture and whisk quickly — this is your temper. Now pour the rest of the mango puree in slowly, whisking as you go.
The batter will be pourable and smooth, almost like a loose curd.
Pour the filling over your partially cooled crust.
Step 4: Bake the Bars
Slide the pan back into the 350°F oven and bake for 22–26 minutes. The edges should be set and the center should have just the faintest wobble — like a barely-set Jell-O.
It will firm up completely as it cools, so resist the urge to overbake. An overbaked mango bar filling turns rubbery. Not ideal.
Remove from the oven. Let it cool at room temperature for 30 minutes, then transfer to the fridge for at least 2 hours (overnight is even better).
Step 5: Make the Lime Glaze & Finish
Once the bars are fully chilled and set, whisk together ¾ cup sifted powdered sugar, 2 tbsp fresh lime juice, and ½ tsp lime zest until smooth. The glaze should drizzle off a spoon in a slow, steady ribbon. Too thick? Add lime juice a few drops at a time. Too thin? Add a touch more powdered sugar.
Lift the bars out of the pan using the parchment handles. Drizzle the glaze all over the top. Let it set for 10 minutes, then slice into 16 bars with a sharp knife wiped clean between each cut.
Chef’s Note: A warm, dry knife gives you those clean, bakery-worthy edges. Run the blade under hot water, wipe dry, cut, repeat.
Troubleshooting & FAQs
Q: My filling didn’t set — it’s still jiggly even after chilling. What happened?
Most likely the filling was underbaked, or the mango puree wasn’t reduced enough. Next time, reduce the puree until it’s noticeably thicker. If this batch is too soft, pop it back in the oven (yes, after it’s already been chilled) at 325°F for 10 minutes, then re-chill. It sounds wrong, but it works.
Q: The crust crumbled when I cut the bars. Help.
Two possible culprits: the crust wasn’t pressed in firmly enough before blind baking, or the bars were cut before fully chilled. Always chill fully, and make sure to press that crust down with real pressure. Think about it like you mean it.
Q: Can I make these with store-bought mango puree?
You can, but drain off some liquid first and still do the stovetop reduction step. Most commercial purees are looser and sweeter than homemade. Adjust your sugar slightly if your puree is pre-sweetened.
Q: Can I freeze mango bars?
Yes — but freeze them before adding the glaze. Layer them between sheets of parchment in an airtight container and freeze for up to 2 months. Thaw overnight in the fridge, then add fresh glaze just before serving. The glaze doesn’t freeze well; it gets sticky and weeps.
Storage, Reheating & Make-Ahead Tips
Fridge: Store cut bars in an airtight container with parchment between layers for up to 5 days. They actually taste better on Day 2, once the flavors have had time to settle.
Freezer: Freeze unglaized bars (well-wrapped) for up to 2 months. Thaw in the fridge overnight.
Reheating: These are served cold or at room temp — no reheating needed. If they’ve been in a cold fridge, pull them out 15 minutes before serving so the filling softens just slightly.
Make-Ahead Strategy: Bake the crust and filling up to 2 days ahead. Keep covered in the fridge. Add the lime glaze the morning you’re serving — it looks and tastes its freshest within a few hours of being glazed.
Check — Mixed Berry Ice Cream Recipe
Check — Perfect Panna Cotta Recipe
Check — Homemade Peppermint Ice Cream
Check — Mango Fruit Ice Cream