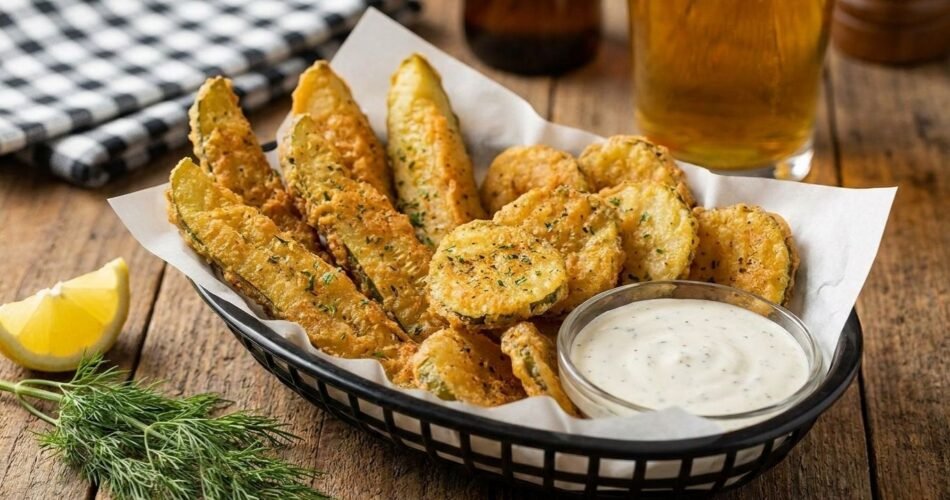
The first time I had fried dill pickles was at a roadside bar in Tennessee. They arrived in a red plastic basket — shatteringly crispy, blazing hot, with that sharp vinegary punch cutting right through the fried coating. I ate the entire basket before anyone else at the table got one.
Then I spent about two years trying to recreate them at home. And failing.
The coating kept sliding off. Or it’d go soggy before it even hit the table. Or the pickles were so wet inside that the whole thing just tasted like a soggy mess wrapped in disappointment.
This fried dill pickles recipe is the version I finally landed on — and it fixes every single one of those problems.
These are for you if you’re hosting a game day crowd, need a seriously impressive party appetizer, or just want a snack that disappears faster than you can make it. Kids love them. Adults absolutely demolish them. And they take about 20 minutes start to finish.
Why This Fried Dill Pickles Recipe Actually Works
I’ve tested a lot of versions. Here’s what separates this one from the rest.
1. You Dry the Pickles First
This is the single biggest mistake most home cooks make. Wet pickles = sliding coating = soggy disaster.
Patting your pickle slices completely dry with paper towels before dredging them is non-negotiable. I’ll usually lay mine out on a sheet pan lined with paper towels and let them sit for 10 full minutes. The coating has something to actually grip onto.
2. The Double-Dredge Method
One pass through flour, then buttermilk, then seasoned flour again. That second layer of flour is what creates those incredibly craggy, textured edges that get extra crispy in the oil. Skip it and you’ll get a thin, sad shell. Do it and you’ll get serious crunch.
3. Buttermilk Is Not Optional
The acidity in buttermilk acts like a glue between your pickle and your flour. It also tenderizes ever so slightly, which sounds weird for something you’re deep-frying, but it matters. No buttermilk on hand? Mix 1 cup of whole milk with 1 tablespoon of white vinegar, let it sit for 5 minutes, and you’ve got a solid substitute.
4. Oil Temperature Is Everything
You want your oil at 375°F (190°C). Not “hot enough.” Not “it looks ready.” Use a thermometer.
Too cool and the pickles absorb oil and go greasy. Too hot and the coating burns before the inside warms through. I use a simple clip-on candy thermometer — it’s one of the best $10 investments I’ve ever made for frying.
5. Don’t Crowd the Pan
Every batch should have breathing room. Overcrowding drops the oil temperature fast, and you’ll end up steaming rather than frying. Work in small batches of 6–8 slices. Yes, it takes a few extra minutes. Yes, it’s absolutely worth it.
Key Ingredients & Smart Substitutions
Dill pickle slices — Grab a jar of pre-sliced chips (about ¼-inch thick). You want pickles with serious tang. Vlasic and Claussen are both great. Whole dill pickles sliced at home work too — just keep them even.
All-purpose flour — The backbone of your coating. For a gluten-free version, a 1:1 gluten-free flour blend works surprisingly well here.
Buttermilk — The acid is key for adhesion and flavor. Dairy-free? Use unsweetened oat milk with a splash of apple cider vinegar.
Cornmeal — Just a little mixed into the second flour dredge adds a subtle gritty crunch that takes these to the next level. Don’t skip it.
Smoked paprika — Adds a gentle warmth and beautiful color to the coating. Regular paprika is fine, but smoked gives you something special.
Garlic powder — Essential. It weaves through the coating and blooms beautifully in the hot oil.
Cayenne pepper — Optional, but even a small pinch adds background heat that makes these genuinely interesting.
Neutral oil for frying — Vegetable oil, canola, or peanut oil. You need something with a high smoke point. Olive oil is not your friend here.
Ranch or remoulade for dipping — Homemade is best, but honestly, a really good store-bought ranch is perfectly fine.
Step-by-Step Instructions
Step 1: Dry Your Pickles
Spread your pickle slices in a single layer on a paper towel-lined baking sheet. Lay more paper towels on top and press down gently. Let them sit for at least 10 minutes.
Chef’s Note: If you’re in a rush, you can pat them dry and go — but giving them that rest time makes a real difference.
Step 2: Set Up Your Dredging Station
In a shallow bowl, combine 1 cup of all-purpose flour with 1 teaspoon each of garlic powder, smoked paprika, salt, and black pepper. Add a pinch of cayenne if you’re using it.
In a second shallow bowl, pour in 1 cup of buttermilk.
In a third shallow bowl, mix together another ¾ cup of flour with ¼ cup of fine cornmeal and a pinch more salt.
Chef’s Note: Set these bowls up in a line — flour, buttermilk, cornmeal flour. Assembly line style means you’ll keep one hand “dry” and one hand “wet” and avoid turning your fingers into a dredged nightmare.
Step 3: Heat Your Oil
Pour your oil into a heavy-bottomed pot or Dutch oven — about 2–3 inches deep. Clip on your thermometer and heat over medium-high until the oil reads 375°F (190°C). This usually takes 8–10 minutes.
Step 4: Dredge the Pickles
Working in batches, take a dried pickle slice and dredge it in the first flour bowl. Shake off excess. Dip it into the buttermilk and let the excess drip off. Then press it into the cornmeal-flour mixture, making sure you coat both sides and press lightly to help it adhere.
Set coated pickles on a clean plate while you finish the batch.
Chef’s Note: I usually dredge 8–10 slices before I start frying, so I’m not fumbling between the bowl and the pot with hot oil waiting.
Step 5: Fry in Batches
Carefully lower 6–8 coated pickles into the hot oil. Don’t walk away. Fry for 2–3 minutes, flipping once halfway through, until they’re deep golden brown.
Chef’s Note: The sizzle should be loud and aggressive when they hit the oil. If it’s quiet and lazy, your oil isn’t hot enough — pull the pickles out and wait.
Step 6: Drain and Salt Immediately
Use a spider strainer or slotted spoon to lift the fried pickles out and place them on a wire rack set over a baking sheet. Season immediately with a pinch of flaky salt while they’re still hot.
Chef’s Note: Always drain on a wire rack, not paper towels. Paper towels trap steam underneath and make the bottom soggy. The rack keeps air circulating all around.
Step 7: Repeat and Serve
Bring the oil back to 375°F between each batch. This is critical. Then fry the next batch.
Serve immediately with ranch, remoulade, or spicy aioli alongside.
Troubleshooting & FAQs
Q: Why is my coating falling off during frying?
Almost always a moisture issue. Your pickles weren’t dry enough before dredging, or you skipped the first flour dredge and went straight to the buttermilk. That first flour layer is the anchor. Go back to Step 1 and dry more aggressively.
Q: My fried pickles came out greasy. What happened?
The oil wasn’t hot enough when they went in. Cool oil means the coating absorbs fat instead of crisping immediately. Check your thermometer every single batch — oil temperature drops when you add food and can take 1–2 minutes to recover.
Q: Can I use an air fryer instead?
Yes, with adjusted expectations. Spray your coated pickles generously with cooking spray and air fry at 400°F for 8–10 minutes, flipping halfway. They’ll be crispier than baked, but won’t have the same deep-golden crunch as oil-fried. Still delicious though.
Q: Can I use pickle spears instead of chips?
Absolutely. Just slice them lengthwise and pat them extra dry — spears hold more moisture than chips. Add 1–2 extra minutes to your fry time.
Storage, Reheating & Make-Ahead Tips
Let’s be honest: fried pickles are best eaten immediately. Right out of the oil, still steaming, slightly dangerous to touch. That’s the ideal scenario.
Storing leftovers: If you have some left over (it happens rarely), store them in an airtight container in the refrigerator for up to 2 days. Expect them to lose their crunch as they sit.
Reheating: Skip the microwave entirely — it’ll make them rubbery and sad. Instead, spread them in a single layer on a baking sheet and reheat in a 400°F oven for 8–10 minutes. They won’t be quite as good as fresh, but they’ll be genuinely crispy again.
Can you freeze them? Technically yes, but I don’t recommend it. The pickles release moisture as they thaw and the coating gets gummy. If you want to prep ahead, dredge the pickles, lay them on a parchment-lined sheet pan, and freeze them before frying. Then fry straight from frozen — add 1 extra minute to your cook time.
For parties: Set up your dredging station and dry your pickles up to an hour ahead. Fry in batches as guests arrive. Fried-to-order beats sitting under a heat lamp every single time.
Read — Garlic Butter Pepperoni Pizza Muffins
Read — Almond Flour Biscuits Recipe
Read — Crunchy Taco Cups Recipe