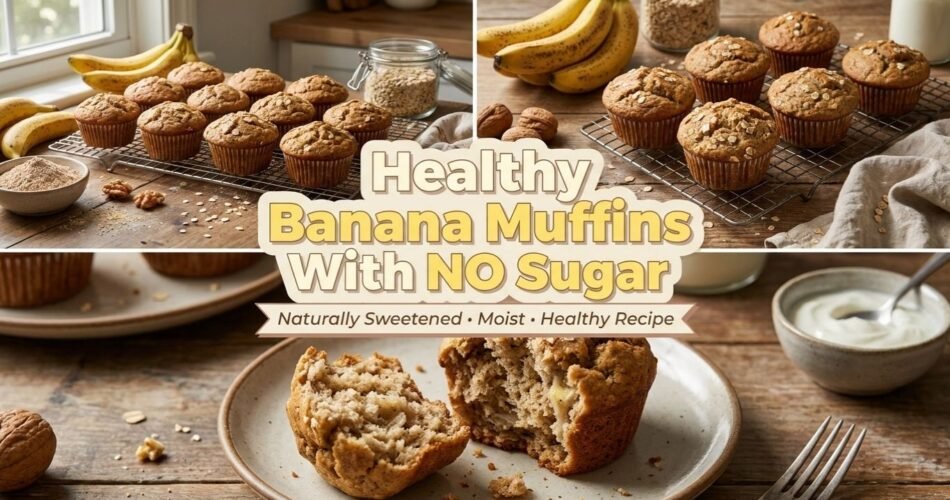
If you’ve got a couple of sad-looking bananas sitting on your counter turning brown, don’t throw them out. Those overripe bananas are about to become something seriously good. These banana muffin recipes are some of the most-made recipes in my kitchen, and for good reason — they’re soft, moist, naturally sweet, and come together in under 35 minutes.
Whether you’re baking for your kids before school, prepping snacks for the week, or just looking for something comforting to make on a Sunday morning, these muffins hit the mark every time. No stand mixer required, no fancy ingredients — just simple pantry staples and a bowl.
I’ve been making banana muffins for over a decade, and I’ll walk you through everything: the exact techniques, the common mistakes, and the little tricks that make the difference between a good muffin and a great one.
Why You’ll Love This Recipe
- Uses up overripe bananas — the riper the banana, the sweeter and more flavorful your muffins
- One bowl, minimal cleanup — you don’t need a mixer or any fancy equipment
- Ready in about 30 minutes — faster than most baked goods
- Naturally moist and tender — no dry, crumbly muffins here
- Beginner-friendly — clear steps make this foolproof even if you’ve never baked before
- Easily customizable — add chocolate chips, walnuts, blueberries, or cinnamon streusel
- Freezer-friendly — bake a batch and freeze for easy grab-and-go snacks
- Kid-approved — even picky eaters love these
Why This Recipe Works
Let me break down the food science here, because understanding why things work makes you a better baker.
Overripe bananas are the key. When a banana turns spotty and dark, its starches have converted into sugars. That’s why overripe bananas are so much sweeter and more intensely flavored than yellow ones. You get natural sweetness, more moisture, and that classic banana flavor — all from the fruit itself.
Melted butter over creamed butter. I use melted butter in this recipe instead of softened butter. Melted butter coats the flour differently and produces a denser, moister crumb — which is exactly what you want in a muffin. Creaming butter and sugar introduces air, which is great for cakes but can make muffins slightly dry.
The muffin method matters. Banana muffin recipes that use the “muffin method” — mixing wet ingredients separately, then folding into dry ingredients — almost always produce a better texture. Why? Because once liquid hits flour and you start stirring, gluten develops. The less you mix, the less gluten, and the lighter and more tender the muffin.
A touch of sour cream or yogurt. Adding a couple tablespoons of sour cream or plain yogurt keeps the muffins incredibly moist for days. The slight acidity also reacts with baking soda to help the muffins rise evenly.
Room temperature eggs. Cold eggs can firm up the melted butter and create a slightly lumpy, uneven batter. Room temperature eggs blend more smoothly and create a more consistent texture.
Ingredients You’ll Need
Here’s what you’ll need for a standard batch of 12 muffins. I’ve included notes on each ingredient so you know exactly what you’re working with.
Dry Ingredients
- 1 ¾ cups (220g) all-purpose flour — the base of the muffin. Spoon flour into your measuring cup and level it off — scooping directly packs in too much flour.
- 1 teaspoon baking soda — reacts with the acidic bananas and sour cream to help the muffins rise. Don’t substitute baking powder in a 1:1 ratio — they’re not the same.
- ½ teaspoon baking powder — adds a little extra lift.
- ½ teaspoon fine sea salt — balances the sweetness and brings out the banana flavor.
- 1 teaspoon ground cinnamon — optional but highly recommended. It complements banana beautifully.
Wet Ingredients
- 3 large overripe bananas (about 1 ½ cups mashed) — the riper, the better. You want them very soft, deeply speckled, and almost black if possible.
- ¾ cup (150g) granulated sugar — you can reduce to ½ cup if your bananas are very sweet.
- 2 large eggs, room temperature — bind the batter and add structure.
- ⅓ cup (75g) unsalted butter, melted and slightly cooled — fat for moisture and richness.
- ¼ cup (60g) sour cream or plain full-fat yogurt — keeps muffins moist for days.
- 1 teaspoon pure vanilla extract — adds warmth and depth to the flavor.
Optional Add-Ins
- ½ cup chocolate chips — semi-sweet or dark work best
- ½ cup chopped walnuts or pecans — adds crunch and a nutty richness
- ½ cup fresh or frozen blueberries — toss in a little flour first so they don’t sink
- Cinnamon streusel topping — mix 3 tbsp flour, 3 tbsp brown sugar, 1 tbsp butter, ½ tsp cinnamon for a bakery-style top
How to Make Banana Muffin Recipes
Follow these steps carefully, and you’ll have perfect muffins every single time.
Step 1: Preheat Your Oven and Prep Your Pan
Preheat your oven to 425°F (220°C). Line a 12-cup muffin tin with paper liners or lightly grease each cup with non-stick spray.
Chef’s Note: Starting at a higher temperature creates that nice domed top on your muffins. After the first 5 minutes, you’ll drop the heat. This is a professional baker’s trick that makes a real difference.
Common mistake to avoid: Don’t skip greasing around the top edge of the muffin cups. Overflow batter sticks and tears your muffins when you try to remove them.
Step 2: Mash the Bananas
In a large mixing bowl, peel and mash your bananas using a fork. Mash until mostly smooth — a few small lumps are fine and actually add a bit of texture.
What to look for: You want the mashed banana to look like a thick, slightly chunky paste.
Chef’s Note: If your bananas aren’t quite ripe enough, you can speed up the process. Place unpeeled bananas on a baking sheet and roast at 300°F for 15–20 minutes until the skins turn black. Let cool completely before using.
Step 3: Mix the Wet Ingredients
Add the melted butter, sugar, eggs, sour cream, and vanilla extract to the mashed bananas. Whisk everything together until combined and smooth.
What to look for: A thick, creamy mixture with a consistent color throughout.
Common mistake to avoid: Make sure your melted butter is slightly cooled before adding the eggs — if it’s too hot, it can cook the eggs slightly and create an unpleasant texture.
Step 4: Add the Dry Ingredients
In a separate small bowl, whisk together the flour, baking soda, baking powder, salt, and cinnamon.
Pour the dry ingredients into the wet ingredients. Using a rubber spatula or wooden spoon, fold everything together gently.
What to look for: Mix just until no dry streaks of flour remain. The batter will look a little rough and lumpy — that’s perfect.
Chef’s Note: The batter should look slightly lumpy. Smooth batter almost always means it’s been overmixed, and that leads to tough, dense muffins.
Common mistake to avoid: Do not use an electric mixer at this stage. Overmixing activates gluten and turns muffins rubbery.
Step 5: Fold in Any Add-Ins
If you’re adding chocolate chips, walnuts, or blueberries, fold them in now with just a few strokes of the spatula.
Common mistake to avoid: Don’t overfold when adding mix-ins. A couple of gentle turns is enough.
Step 6: Fill the Muffin Cups
Divide the batter evenly among the 12 prepared muffin cups. Fill each one about ¾ to ¾ full. If you want extra-domed muffins, you can fill them right to the top.
Sprinkle streusel topping over each muffin now if you’re using it.
Chef’s Note: For really tall, bakery-style muffin tops, fill the cups completely full and make sure the oven is hot when they go in. The initial high heat sets the top quickly and forces the center to rise upward.
Step 7: Bake
Bake at 425°F for 5 minutes, then without opening the oven door, reduce the temperature to 350°F (175°C) and continue baking for 15–17 more minutes.
Total bake time: about 20–22 minutes.
What to look for: Muffins should be golden brown on top, spring back when lightly pressed, and a toothpick inserted in the center should come out clean or with just a few moist crumbs.
Common mistake to avoid: Don’t open the oven during the first 10 minutes. This causes muffins to sink in the center.
Step 8: Cool Before Eating
Let the muffins cool in the pan for 5 minutes, then transfer to a wire rack to cool completely.
Chef’s Note: I know it’s tempting to eat them straight from the pan — and honestly, go for it — but letting them cool for at least 10 minutes lets the structure set and improves the texture noticeably.
Expert Tips for Best Results
- Use the ripest bananas you have. Seriously, the blacker the peel, the better the muffin. Don’t be afraid of those ultra-soft bananas.
- Measure flour correctly. Spoon it into your measuring cup, then level with a knife. Scooping directly compacts the flour and can add up to 20% extra, leading to dry, heavy muffins.
- Don’t skip the sour cream. It’s one ingredient that genuinely changes the texture. Plain Greek yogurt works just as well if you don’t have sour cream on hand.
- Room temperature ingredients blend better. Take your eggs out of the fridge 30 minutes before you bake.
- Use an ice cream scoop to fill the muffin cups. It’s the easiest way to get even portions without making a mess.
- Tap the muffin tin on the counter once before baking to release any large air bubbles in the batter.
- Rotate the pan halfway through baking if you know your oven has hot spots.
- Sprinkle a little coarse sugar on top before baking for a beautiful, crunchy top — it’s simple and makes a big visual difference.
- Let the batter rest for 5 minutes after mixing if you want slightly taller muffins. This gives the baking powder time to activate.
- Test your baking soda before using it. If it’s been open in your cabinet for a while, drop a small amount in hot water. If it doesn’t fizz, it’s too old and your muffins won’t rise properly.
- Don’t over-bake. Pull the muffins out as soon as the toothpick comes out clean. Even a few extra minutes can dry them out significantly.
Common Mistakes to Avoid
Using Bananas That Aren’t Ripe Enough
Cause: Yellow or green-tipped bananas don’t have enough sugar or moisture.
Solution: Wait until bananas are deeply speckled or use the oven-ripening method mentioned in Step 2.
Overmixing the Batter
Cause: Stirring too vigorously or too many times after the flour is added develops gluten and makes muffins tough and rubbery.
Solution: Fold gently, stop as soon as you don’t see dry flour streaks, and accept a lumpy batter.
Filling Muffin Cups Too Little
Cause: Under-filled cups create flat, sad-looking muffins that dry out faster.
Solution: Fill each cup ¾ to completely full for a proper rise and dome.
Baking at the Wrong Temperature
Cause: A too-low oven temperature leads to flat, pale muffins with poor texture.
Solution: Always preheat fully. Use an oven thermometer — most home ovens run 25–50°F hotter or cooler than the dial says.
Opening the Oven Too Early
Cause: The sudden drop in temperature deflates muffins that haven’t set yet.
Solution: Resist opening the oven door for at least the first 10 minutes of baking.
Troubleshooting Guide
My Muffins Are Too Dry
Problem: Over-baked or too much flour.
Fix: Check your measuring technique — spoon flour, don’t scoop. Pull muffins out of the oven the moment the toothpick comes out clean. Next time, add an extra tablespoon of sour cream.
My Muffins Are Too Dense and Heavy
Problem: Overmixed batter or expired leavening agents.
Fix: Test your baking soda (drop in hot water — it should fizz). Mix batter less next time — lumpy is good.
My Muffins Sank in the Center
Problem: Underbaked, oven too cool, or oven door opened too early.
Fix: Use an oven thermometer to verify actual oven temperature. Bake until a toothpick comes out completely clean.
Burnt Edges But Raw Center
Problem: Oven temperature too high, or muffins placed on top rack.
Fix: Move the pan to the middle rack. Use a lighter-colored muffin tin — dark pans absorb more heat and can burn edges.
Muffins Stick to the Liners
Problem: Low-quality paper liners or muffins cooled in the pan too long before eating.
Fix: Use quality non-stick liners, or try silicone muffin cups. Let muffins cool for at least 5 minutes before removing — or allow to cool completely before peeling the liner.
Frequently Asked Questions
Can I make banana muffins without eggs?
Yes, you can. Replace each egg with a flax egg (1 tablespoon ground flaxseed mixed with 3 tablespoons water, rested for 5 minutes) or ¼ cup unsweetened applesauce per egg. The texture will be slightly denser, but the muffins will still hold together and taste great.
How ripe should bananas be for banana muffins?
The riper the better. For the best banana muffin recipes, you want bananas that are heavily speckled with brown spots or almost entirely black. At that stage, they’re at their sweetest and softest, which means more natural flavor and moisture in your muffins. If your bananas aren’t ripe enough, roast them in the oven at 300°F for 15–20 minutes until the skins blacken.
Can I use frozen bananas for muffins?
Absolutely. Frozen and thawed bananas work wonderfully — they often become even sweeter after freezing. Thaw them completely, drain off any excess liquid, and mash as usual. This is actually one of the best ways to always have ripe bananas ready for baking.
How do I make banana muffins more moist?
The key to moist banana muffins is a combination of overripe bananas, melted butter instead of oil, and a tablespoon or two of sour cream or Greek yogurt. Also, make sure you’re not over-baking — pull them from the oven as soon as the toothpick test is clean. Storing in an airtight container also keeps them moist longer.
Can I make banana muffins healthier?
Yes, there are several easy swaps. Reduce the sugar by a third if your bananas are very ripe. Replace half the all-purpose flour with whole wheat flour for more fiber. Use coconut oil instead of butter. You can also swap sour cream for plain Greek yogurt to add protein. These swaps slightly change the texture but still produce a delicious, satisfying muffin.
Read — Lemon Blueberry Bars Recipe
Read — Peanut Butter Ice Cream Recipe
Read — Strawberry Oatmeal Breakfast Bars
Read — Perfect Panna Cotta Recipe