I burned my first batch of lemon bars. Completely. The edges turned dark brown while the center stayed jiggly, and I wanted to cry.
That was eight years ago, and I’ve made these lemon-blueberry bars at least a hundred times since. They’re now my go-to dessert when I need something that looks impressive but doesn’t require fancy equipment or pastry school skills.
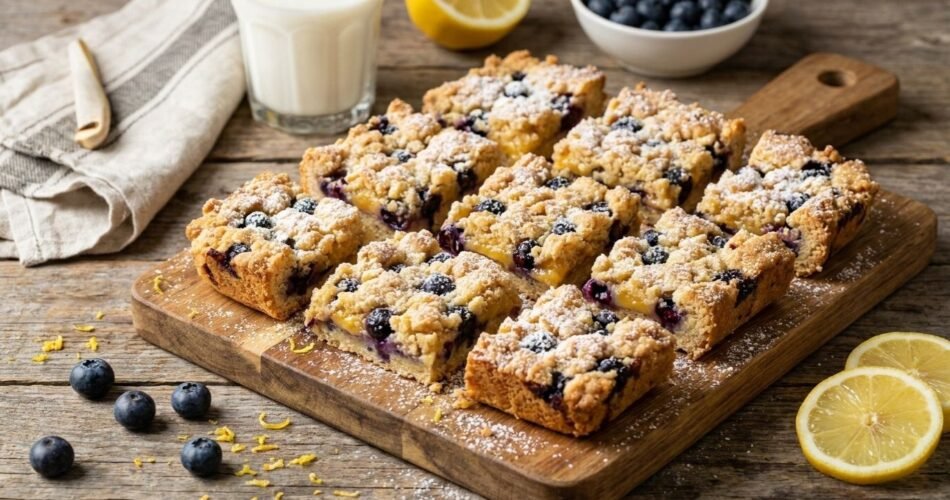
Here’s what makes these bars special: you get that classic tangy lemon bar flavor, but the blueberries add little pockets of jammy sweetness that balance everything out. The crust is buttery and actually stays crisp (no soggy bottoms here). And you can make the whole thing in one afternoon without breaking a sweat.
These lemon blueberry bars are perfect for summer potlucks, Mother’s Day brunch, or when you’re craving something bright and fruity but don’t want to turn on the oven for hours. They slice cleanly, travel well, and honestly taste better the next day.
Why This Recipe Actually Works
I’ve tested dozens of lemon bar recipes, and most fall into the same traps. Too sweet. Soggy crust. Filling that weeps liquid. Here’s what makes this version different:
We pre-bake the crust completely. This isn’t optional. A fully baked crust creates a barrier that prevents the lemon filling from soaking in. You’ll get clean slices with distinct layers instead of a mushy mess.
Cold butter in the crust, room temperature eggs in the filling. The cold butter creates a flaky, cookie-like base. But room temperature eggs whip up better with the sugar, giving you that silky, smooth filling with no lumps.
Fresh blueberries, not frozen. I know frozen seems convenient, but they release too much water when they bake. Fresh blueberries hold their shape and don’t turn your filling purple (unless you want that, which is totally fine).
The flour-to-liquid ratio is precise. Too much flour and your filling gets gummy. Too little and it never sets. This recipe uses just 3 tablespoons of flour for the filling, which gives you that perfect custard-like texture that’s firm enough to slice but still creamy.
We let them cool completely before cutting. I know it’s tempting, but warm bars will fall apart. Patience pays off here. Stick them in the fridge for at least 2 hours, and you’ll get bakery-perfect squares.
Key Ingredients & Smart Substitutions
FOR THE CRUST:
All-purpose flour – This creates structure. You can use a 1:1 gluten-free baking flour if needed, though the texture will be slightly more crumbly.
Unsalted butter (cold) – Cold butter is key for a tender, flaky crust. Don’t use margarine or melted butter here.
Powdered sugar – This dissolves into the dough better than granulated and makes the crust more delicate. Don’t swap it.
Vanilla extract – Just a touch adds depth. Use the real stuff, not imitation.
FOR THE FILLING:
Fresh lemons – You’ll need both juice and zest. Meyer lemons work great if you want a sweeter, less acidic flavor.
Granulated sugar – Balances the tartness. You can reduce it by ¼ cup if you prefer a more puckery bar.
Eggs – They set the filling. Make sure they’re room temperature so they blend smoothly.
All-purpose flour – Just enough to help the filling set without making it cakey.
Fresh blueberries – Small wild blueberries work best because they don’t sink. Regular blueberries are fine too.
Powdered sugar (for dusting) – Optional but makes them look professional.
Step-by-Step Instructions (With Chef’s Tips)
STEP 1: Prep your pan and preheat
Preheat your oven to 350°F. Line a 9×13-inch baking pan with parchment paper, leaving overhang on two sides (this is your handle for lifting the bars out later). Don’t skip the parchment or you’ll never get clean slices.
Pro Tip: Lightly spray the pan before adding parchment so it sticks in place while you pour the batter.
STEP 2: Make the shortbread crust
Cut your cold butter into small cubes. In a large bowl, whisk together 2 cups flour and ½ cup powdered sugar. Add the butter cubes and use a pastry cutter or your fingers to work it in until the mixture looks like coarse sand with some pea-sized butter pieces.
Press this mixture firmly and evenly into your prepared pan. Really press it down—loose crumbs won’t form a solid crust.
Chef’s Note: If the dough feels too crumbly to hold together, that’s normal. Just keep pressing. The butter will melt and bind everything when it bakes.
STEP 3: Blind bake the crust
Bake the crust for 18-20 minutes until the edges are just starting to turn golden. You want it fully baked, not just set. This prevents a soggy bottom.
While it bakes, make your filling. Timing is everything here.
STEP 4: Prepare the lemon-blueberry filling
Zest 2-3 lemons (you need about 1 tablespoon of zest). Then juice them until you have ⅔ cup of fresh lemon juice.
In a large bowl, whisk together 4 eggs and 1¾ cups sugar until smooth. Add the lemon juice, lemon zest, and 3 tablespoons of flour. Whisk until completely combined and slightly frothy.
Gently fold in 1½ cups of fresh blueberries. Don’t overmix or they’ll burst.
Pro Tip: Save a few blueberries to scatter on top of the filling right before baking. They look gorgeous and give you more fruit in every bite.
STEP 5: Bake the bars
When the crust comes out of the oven, immediately pour the lemon-blueberry filling over it. Work quickly so the crust is still hot—this helps the filling set properly at the edges.
Return to the oven and bake for 22-25 minutes. The filling should be set around the edges but still have a slight jiggle in the center (about the size of a quarter). It’ll firm up as it cools.
Chef’s Note: Overbaking makes the filling rubbery. Underbaking means it won’t slice. Look for that tiny jiggle.
STEP 6: Cool completely
Let the pan cool on a wire rack for 30 minutes, then transfer to the refrigerator for at least 2 hours. I usually make these in the morning and let them chill all day.
Once cold, use the parchment overhang to lift the whole slab out. Place on a cutting board and use a sharp knife (wiped clean between cuts) to slice into 24 bars.
Dust with powdered sugar right before serving.
Troubleshooting & FAQs
Q: My filling didn’t set. What happened?
You probably didn’t bake it long enough or cut into it too soon. The filling needs to be mostly set when it comes out (with just a small jiggle), and it must chill completely. If it’s too late, pop it back in the fridge overnight—it’ll firm up more.
Q: Can I use frozen blueberries?
You can, but thaw them completely and pat them dry with paper towels first. They’ll still release some color, so expect a slightly purple-tinted filling. Not bad, just different.
Q: The crust is too hard. Help!
You might’ve overbaked it or added too much flour. Make sure you’re measuring flour correctly (spoon it into the cup and level off—don’t pack it). Also, don’t bake the crust past golden brown at the edges.
Q: Can I make these in advance?
Absolutely. They’re actually better the next day. The flavors meld and the texture improves. Make them up to 3 days ahead and keep refrigerated.
Q: Why are my bars falling apart when I cut them?
Two reasons: you didn’t press the crust firmly enough, or you cut them while still warm. Always chill completely and use a sharp knife wiped between each cut.
Q: Can I double this recipe?
Sure, but bake in two separate 9×13 pans rather than one large pan. The baking time will be the same.
Storage, Reheating, and Meal Prep
REFRIGERATOR: Store lemon blueberry bars in an airtight container in the fridge for up to 5 days. Layer parchment between them so they don’t stick together. Don’t leave them at room temperature for more than 2 hours or the filling can spoil.
FREEZER: These freeze beautifully. Wrap individual bars in plastic wrap, then place in a freezer-safe bag. Freeze for up to 3 months. Thaw in the refrigerator overnight before serving.
DO THEY NEED TO BE REHEATED? Nope. These are meant to be served chilled or at cool room temperature. Reheating makes the filling weepy.
MEAL PREP TIP: I bake these on Sunday and keep them in the fridge for easy desserts or breakfast treats (don’t judge me) throughout the week. They hold up perfectly.
Read — Garlic Butter Pepperoni Pizza Muffins
Read — Almond Flour Biscuits Recipe
Read — Crunchy Taco Cups Recipe
Read — Fried Dill Pickles Recipe
Thanks for Sharing Recipe