The first time I made tiramisu, I completely ruined it. The filling was soupy, the ladyfingers turned to mush, and the whole thing slid apart on the serving plate like a sad, caffeinated landslide. I served it anyway. My guests ate it with spoons and called it a “deconstructed dessert.” We all laughed. I went home and figured out exactly what went wrong.
That was eleven years ago. Now this tiramisu recipe is the most requested thing I make. Full stop.
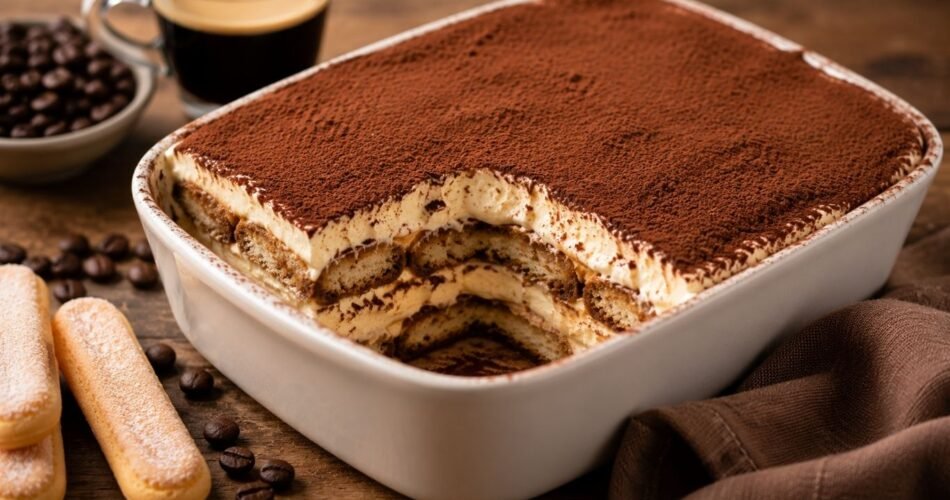
No baking. No special equipment. About 30 minutes of active work. And the result is this impossibly creamy, deeply coffee-flavored, cloud-like dessert that genuinely tastes like something from a Roman trattoria.
This recipe is perfect for dinner parties, holidays, or honestly any Tuesday where you need something extraordinary waiting in the fridge.
Why This Tiramisu Recipe Actually Works
There are thousands of tiramisu recipes online. Most of them skip over the details that actually matter. Here’s what makes this one different.
1. We Use Egg Yolks Only (No Whole Eggs)
Traditional Italian tiramisu uses just egg yolks whisked with sugar. Whole eggs make the filling looser and less rich. Yolks give you that thick, golden, custardy base that holds everything together beautifully.
2. The Sugar Is Whisked Until Pale and Ribbon-Like
This step takes patience — about 5 full minutes of whisking. When you lift your whisk and the mixture falls back in thick, slow ribbons, you’ve got it right. This incorporates air and creates structure. Rush it, and your filling will be dense and flat.
3. Mascarpone Goes In Cold
Don’t let your mascarpone come to room temperature. Cold mascarpone folds in much more smoothly and reduces the chance of the filling splitting or becoming grainy. This was my original mistake. It matters enormously.
4. The Coffee Dip Is a Flash, Not a Bath
Two seconds per side. Seriously. Ladyfingers are porous and they absorb liquid fast. Over-soaking is the number one reason tiramisu turns into a puddle. You want them moist throughout, not waterlogged.
5. It Needs Real Rest Time
Six hours in the fridge minimum. Overnight is better. The layers settle, the flavors meld, and the texture firms into something genuinely spectacular. Tiramisu made the night before is always — always — better than tiramisu made the same day.
Key Ingredients & Smart Substitutions
Egg Yolks — The backbone of the filling. Use large, fresh eggs. If you’re concerned about raw eggs, see the FAQ below for a safe alternative.
Granulated Sugar — Dissolves into the yolks as you whisk. Don’t swap for powdered sugar here; the texture won’t be the same.
Mascarpone Cheese — Non-negotiable for authentic flavor. If you genuinely can’t find it, full-fat cream cheese works in a pinch but it’s tangier and less silky. It’ll still be delicious, just different.
Heavy Whipping Cream — We fold whipped cream into the mascarpone mixture for extra lightness. Use cream with at least 35% fat content so it whips properly.
Strong Espresso or Coffee — Use real espresso if you can. Strong brewed coffee from a moka pot works perfectly. Instant espresso powder dissolved in hot water is a solid backup. Let it cool completely before using.
Coffee Liqueur (Kahlúa or Marsala Wine) — Optional but genuinely good. Adds depth and a subtle boozy warmth. Skip it for an alcohol-free version — the dessert is still excellent.
Savoiardi Ladyfingers — The Italian kind, not the soft sponge-cake style. Savoiardi are crisp and dry, which means they absorb the coffee without disintegrating. Find them at most grocery stores or Italian delis.
Unsweetened Cocoa Powder — The finishing touch. Use good quality cocoa. It’s the first thing people see and taste when they take a bite.
How to Make Tiramisu
Step 1: Make the Espresso Mixture
Brew 1½ cups of strong espresso or very strong coffee. Stir in 2 tablespoons of Kahlúa or Marsala (if using). Set it aside and let it cool completely to room temperature.
What to look for: It should be room temperature or cold. Hot coffee will melt your mascarpone filling during assembly.
Mistake to avoid: Don’t skip the cooling step. Fifteen minutes on the counter, or pop it in the fridge to speed things up.
Step 2: Whisk the Egg Yolks and Sugar
In a large bowl, whisk together 4 egg yolks and ½ cup of granulated sugar. Keep whisking until the mixture turns pale yellow, thick, and falls from the whisk in slow, thick ribbons. This takes about 4–5 minutes by hand or 3 minutes with an electric hand mixer.
What to look for: The mixture should roughly double in volume and look almost fluffy.
Chef’s Note: This aeration is building the structure of your filling. Don’t rush it.
Step 3: Fold in the Mascarpone
Add 1 cup (250g) of cold mascarpone to the egg mixture. Gently fold it in with a spatula until smooth and combined. Don’t stir aggressively — gentle folding preserves the air you just worked to build.
What to look for: The mixture should look thick, creamy, and uniform with no white streaks.
Mistake to avoid: Don’t beat the mascarpone in with an electric mixer. It can cause it to split and become grainy.
Step 4: Whip the Cream
In a separate clean bowl, whip ¾ cup (180ml) of heavy cream until soft-to-medium peaks form. You want it fluffy but not stiff.
What to look for: When you lift the whisk, the cream should hold a soft peak that gently curls over at the tip.
Chef’s Note: Cold bowl, cold cream. Pop both in the fridge for 10 minutes before whipping if your kitchen is warm.
Step 5: Combine the Filling
Gently fold the whipped cream into the mascarpone mixture in two additions. Use slow, sweeping motions. The finished filling should be thick, light, and billowy.
Step 6: Dip the Ladyfingers
Working quickly, dip each savoiardi ladyfinger into the cooled espresso mixture. One dip per side — count to two on each side. Lay them in a single layer in your dish (a 9×13 inch / 23x33cm baking dish works perfectly).
Mistake to avoid: Don’t let them sit in the coffee. In and out, two seconds per side. That’s it.
Step 7: First Layer of Filling
Spread half of the mascarpone filling evenly over the soaked ladyfingers. Use an offset spatula or the back of a spoon to smooth it out.
Step 8: Second Layer of Ladyfingers and Filling
Repeat — another layer of quickly dipped ladyfingers, then the remaining mascarpone filling spread on top. Smooth the surface.
Step 9: Refrigerate and Finish
Cover the dish tightly with plastic wrap and refrigerate for at least 6 hours. Overnight is ideal.
Just before serving, dust a generous, even layer of unsweetened cocoa powder over the top through a fine mesh sieve. Slice and serve cold.
Chef’s Note: Add the cocoa right before serving, not before refrigerating. It stays beautifully powdery and fresh this way.
Troubleshooting & FAQs
Q: My filling turned out runny. What happened?
The most common culprits are warm mascarpone, under-whipped cream, or mascarpone that split during folding. Next time, ensure everything is cold. If your filling is already made and looks thin, chill it for 20 minutes and gently fold once more. It should tighten up.
Q: Can I make tiramisu without raw eggs?
Yes. You can gently heat the egg yolks and sugar over a double boiler (a bowl set over barely simmering water), whisking constantly until it reaches 160°F (71°C). This pasteurizes the eggs while still building that rich, thick base. Let it cool slightly before adding the mascarpone.
Q: Can I freeze tiramisu?
You can, but it changes the texture slightly. Freeze it before adding the cocoa dusting, well-wrapped, for up to one month. Thaw overnight in the refrigerator. Add fresh cocoa powder right before serving.
Q: My ladyfingers are completely soggy. How do I fix this for next time?
Two seconds per side — no longer. Also make sure your coffee is cool (not warm), since warmth speeds up absorption. If the dish is already assembled, there’s no fix, but it’ll still taste good. Next time, work faster with the dipping.
Storage, Reheating, and Make-Ahead Tips
Refrigerator: Cover tightly with plastic wrap and store for up to 4 days. The flavor actually improves on day two.
Freezer: Wrap the whole dish (or individual portions) in plastic wrap and then foil. Freeze for up to 4 weeks. Thaw in the refrigerator overnight.
Make-Ahead: This is one of the best make-ahead desserts you can have in your repertoire. Make it the night before your dinner party and it will be perfectly set and ready to go. Add the cocoa dusting just before you bring it to the table.
Reheating: Tiramisu is served cold. No reheating needed or recommended.
Read — Chocolate Mousse Cake Recipe
Read — Berry Chantilly Cake Recipe
Read — Dirt Pudding Recipe
Read — Rocky Road Ice Cream Recipe