Some Sunday mornings, you just need breakfast to be exactly right.
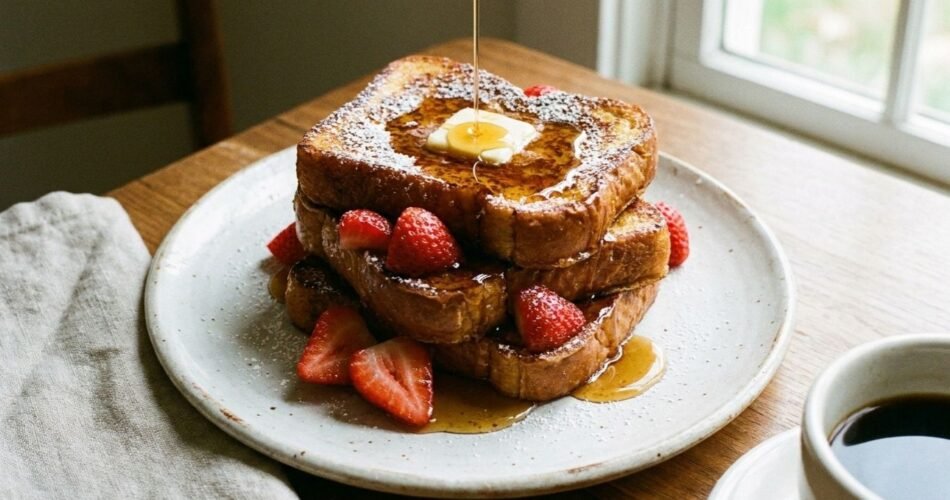
This French toast recipe is exactly that. It’s fast — we’re talking 20 minutes from fridge to plate. It’s forgiving. And it produces that thick, custardy, golden-brown French toast that most diners charge $16 for and somehow still manage to mess up.
I made genuinely terrible French toast for years. Soggy in the middle. Rubbery on the outside. Bland, in that sad, eggy way that makes you question your entire morning. The turning point? I stopped using sandwich bread and started using day-old brioche. That single swap changed everything overnight.
This recipe is perfect for slow weekend mornings, brunch with friends, or honestly — breakfast for dinner on a Tuesday when life feels chaotic and you need something that feels like a hug.
Whether you’re cooking for one or feeding a crowd, let’s make something worth waking up for.
Why This French Toast Recipe Actually Works
1. The Bread Choice is Non-Negotiable (Sort Of)
Brioche or challah are the gold standard here. Both are enriched breads — meaning they’re made with eggs and butter — so they absorb the custard deeply without falling apart. That’s what gives you a creamy interior with a crispy crust. Texas toast or thick-cut white bread are solid backup options. Regular sandwich bread? It’ll work in a pinch, but you’ll notice the difference.
Day-old bread is actually better. Slightly stale bread has less moisture, which means it soaks up your custard mixture without getting waterlogged and turning mushy in the pan.
2. It’s a Custard, Not an Egg Wash
The biggest mistake home cooks make is dunking bread in plain beaten eggs. What you actually want is a custard — eggs whisked together with whole milk (or cream), a little sugar, vanilla, cinnamon, and a pinch of salt. The ratio matters. Too much egg and it tastes like a scrambled egg sandwich. Too much milk and it won’t set properly.
3. The Soak Time is Everything
Give each bread slice at least 20–30 seconds per side in the custard. For thick slices (1-inch or more), go up to 45 seconds per side. You want the custard to penetrate past the surface. Press gently with a fork if needed.
4. Butter + a Little Oil is Your Secret Weapon
Pure butter burns fast. A neutral oil like vegetable or canola oil raises the smoke point and keeps the pan from going dark and bitter before your toast is done. Use a 50/50 split, or add just a teaspoon of oil to your butter. You’ll get that deep golden crust without the acrid burnt-butter smell.
5. Medium Heat. Every Time.
High heat is the enemy. It browns the outside before the inside has a chance to cook through. Medium heat gives you 3–4 minutes per side to develop that beautiful, caramelized crust while the center sets into something soft and almost pudding-like. Patience here is everything.
Key Ingredients & Smart Substitutions
| Ingredient | Why It’s Used | Smart Substitution |
|---|---|---|
| Brioche bread (thick-sliced) | Absorbs custard beautifully without falling apart | Challah, Texas toast, or day-old sourdough |
| Eggs (large) | Creates the custard base and gives structure | No great egg-free sub — but a flax egg + coconut cream works for vegan versions |
| Whole milk | Adds richness and helps bind the custard | Heavy cream (richer), oat milk, or almond milk (slightly thinner result) |
| Vanilla extract | Adds warmth and depth | Vanilla bean paste for extra intensity |
| Ground cinnamon | Classic warm spice that complements egg and bread | Add a pinch of nutmeg or cardamom for something different |
| Granulated sugar | Helps caramelize the crust in the pan | Maple syrup or brown sugar (brown sugar adds molasses depth) |
| Pinch of salt | Balances sweetness and enhances every other flavor | Don’t skip this. Seriously. |
| Unsalted butter | Flavor and browning | Vegan butter works well here |
Gluten-free? Use thick-cut gluten-free sandwich bread. The texture will be slightly more delicate, so soak it for only 15 seconds per side.
Dairy-free? Oat milk or full-fat coconut milk both work well. The coconut milk version has a subtle tropical sweetness that’s actually really lovely.
How to Make French Toast — Step-by-Step
Step 1: Make the Custard
What to do: In a wide, shallow bowl (big enough to fit a bread slice), whisk together 3 large eggs, ¾ cup whole milk, 1 tablespoon sugar, 1 teaspoon vanilla extract, 1 teaspoon cinnamon, and a pinch of salt until fully combined and slightly frothy.
What to look for: No streaks of egg white remaining. The mixture should look uniform and slightly pale.
Common mistake: Whisking too briefly and leaving pockets of unmixed egg white — these cook up rubbery and uneven on your toast.
🍳 Chef’s Note: Add a tablespoon of heavy cream to the custard if you want an ultra-rich, almost dessert-style French toast. It’s worth it on special occasions.
Step 2: Slice and Prep Your Bread
What to do: Slice your brioche into 1-inch thick pieces. If you’re using a pre-sliced loaf, just make sure the slices aren’t too thin — anything under ¾ inch tends to go limp.
What to look for: Slight staleness is fine and preferred. If your bread is very fresh, pop the slices in a 275°F (135°C) oven for 10 minutes to dry them out slightly.
Common mistake: Using bread that’s too fresh and soft — it absorbs liquid too fast and turns to mush before it even hits the pan.
Step 3: Soak the Bread
What to do: Place one slice at a time into the custard bowl. Let it soak for 20–30 seconds per side, pressing gently so the custard absorbs into the interior.
What to look for: The bread should look visibly saturated but not so wet that it’s falling apart when you lift it.
Common mistake: Rushing this step. A quick 3-second dip is how you end up with dry, eggy-tasting French toast.
Step 4: Heat the Pan
What to do: Place a large skillet or griddle over medium heat. Add 1 tablespoon of unsalted butter and 1 teaspoon of neutral oil. Let the butter fully melt and begin to foam — that’s your signal.
What to look for: The foam subsiding slightly (not browning). Once the foam settles, you’re at the perfect cooking temperature.
Common mistake: Adding bread before the pan is hot enough. You want an immediate sizzle the moment the bread makes contact with the pan.
🍳 Chef’s Note: A cast iron skillet gives you the most even, consistent browning. A non-stick pan is easier but produces slightly less color. Both work great.
Step 5: Cook Until Golden
What to do: Lay your soaked bread slices in the pan without crowding them. Cook for 3–4 minutes on the first side without touching them.
What to look for: Deep, golden-brown color on the bottom edge when you peek. The sides should be starting to look set rather than wet.
Common mistake: Flipping too early. Resist the urge. Let the crust form fully before you flip, or it’ll tear and look ragged.
Step 6: Flip and Finish
What to do: Flip each slice once and cook for another 2–3 minutes on the second side.
What to look for: Both sides should be evenly golden. When you press lightly in the center, it should feel set — not jiggly or wet.
Common mistake: Pressing down on the bread with a spatula. You’ll squeeze out all that custardy interior. Just let it cook.
Step 7: Serve Immediately
French toast is at its absolute best the moment it leaves the pan. Dust with powdered sugar, drizzle with real maple syrup, and add fresh berries if you have them.
🍳 Chef’s Note: Keeping cooked French toast warm? Place finished slices in a single layer on a baking sheet in a 200°F (93°C) oven for up to 20 minutes while you cook the rest of the batch.
Troubleshooting & FAQs
Q: My French toast is soggy in the middle — what went wrong?
Almost always, this comes down to heat or bread thickness. If the heat is too high, the outside browns before the inside cooks. Drop to medium-low heat and give it more time. Also double-check that your bread slices aren’t thicker than 1.25 inches.
Q: Can I make this ahead of time?
You can prep the custard mixture up to 24 hours ahead — just cover and refrigerate it. The cooked French toast doesn’t hold incredibly well, but it reheats decently (see Section 6). For a proper make-ahead solution, try an overnight French toast bake instead.
Q: My French toast tastes bland. Where did I go wrong?
Don’t skip the salt in the custard — it sounds counterintuitive, but salt amplifies the vanilla and cinnamon dramatically. Also make sure your vanilla extract is good quality. The cheap stuff genuinely doesn’t taste the same.
Q: Can I freeze French toast?
Yes, absolutely. Cool the cooked slices completely, then freeze them in a single layer on a baking sheet before transferring to a freezer bag. They’ll keep for up to 2 months. Reheat straight from frozen in a toaster or oven — don’t microwave if you can help it.
Storage, Reheating & Meal Prep Tips
Refrigerator: Store cooled French toast slices in an airtight container for up to 3 days. Separate layers with parchment paper so they don’t stick together.
Freezer: Freeze for up to 2 months as described above. This is genuinely a great meal prep strategy — having homemade French toast ready to toast on a busy weekday morning is underrated.
Reheating (Best Method): Pop slices in a toaster on medium setting, or lay them on a baking sheet and reheat at 350°F (175°C) for 8–10 minutes. Both methods restore a decent amount of crispiness.
Reheating (Quick Method): Microwave for 60–90 seconds — it’ll be softer but still tasty. Add a splash of maple syrup on top before microwaving for better results.
Meal Prep Tip: Double the batch, freeze half, and you’ve got a fast, homemade breakfast for the next several weeks. Cook once, enjoy ten times.
Read — Lemon Blueberry Bars Recipe
Read — Best Banana Muffin Recipes
Read — Strawberry Oatmeal Breakfast Bars
Read — Gnocchi alla Norma Recipe