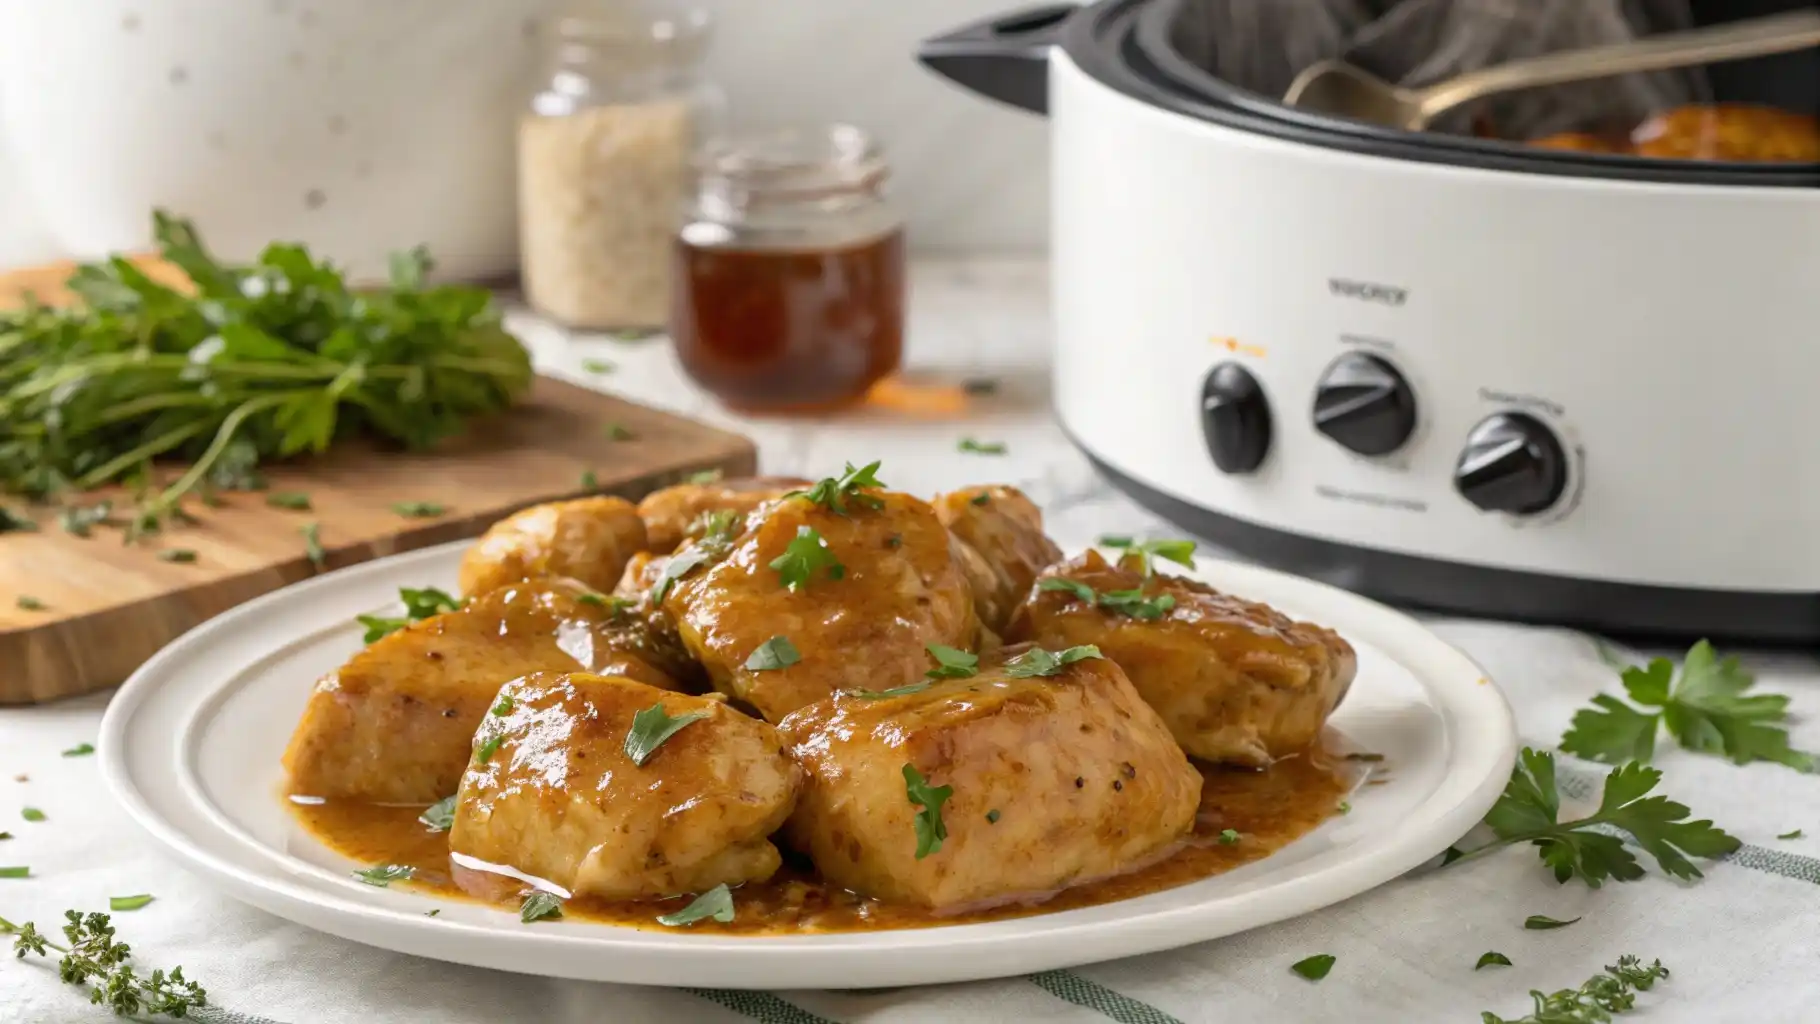
There’s something deeply satisfying about coming home to a house that smells like butter, honey, and garlic. That’s exactly what happens when you make this slow cooker honey butter chicken—a dish that’s become my go-to on busy weeks when I need dinner to basically make itself.
The first time I made this, I was skeptical. Could something so simple really deliver that much flavor? Turns out, yes. The slow cooker does magical things when you give it time, butter, and a good piece of chicken. The meat becomes fall-apart tender, and the sauce reduces into this glossy, slightly thickened glaze that clings to every piece. It’s comfort food without the fuss, and it works whether you’re feeding your family on a Tuesday or looking for something easy to serve guests.
What I love most is the balance. Honey butter chicken could veer into overly sweet territory, but with the right adjustments—a little soy sauce for depth, garlic for savory punch, and just enough acidity—it hits that perfect sweet-savory spot. And unlike stovetop cooking where you need to monitor everything, the slow cooker lets you walk away. No babysitting required.
Why Slow Cooking Works So Well for This Dish
Slow cookers are designed for low and slow cooking, which is exactly what chicken needs to stay juicy and tender. When chicken cooks too quickly or at too high a temperature, the proteins seize up and squeeze out moisture. You end up with dry, tough meat. But in a slow cooker, the gentle heat breaks down collagen gradually, especially in dark meat like thighs, turning it silky and succulent.
The honey butter sauce benefits too. As the chicken cooks, it releases its juices into the butter and honey mixture, creating this rich, savory-sweet base. The slow simmer allows all those flavors to meld together rather than just coating the surface. By the time dinner’s ready, you’ve got chicken that’s absorbed the sauce from the inside out.
The Sweet and Rich Balance
Here’s where people sometimes struggle: getting the honey-to-butter ratio right. Too much honey and it tastes like dessert. Not enough butter and you lose that richness. I’ve found that a 1:1 ratio (about ½ cup of each for 2 pounds of chicken) gives you the best starting point.
But honey and butter alone? That’s one-dimensional. You need something to cut through the sweetness and add complexity. Soy sauce is my secret weapon here—it adds umami and saltiness without making the dish taste Asian-fusion (unless you want it to). A splash of apple cider vinegar or lemon juice at the end brightens everything up. And garlic? Non-negotiable. At least four cloves, minced or pressed.
Ingredients You’ll Need
For the Chicken:
- 2 pounds boneless, skinless chicken (thighs or breasts—more on this below)
- Salt and black pepper to taste
- ½ teaspoon paprika (adds a subtle warmth and color)
For the Honey Butter Sauce:
- ½ cup unsalted butter
- ½ cup honey (I prefer a mild variety like clover or wildflower)
- ¼ cup soy sauce (low-sodium works best so you can control the salt)
- 4–5 cloves garlic, minced
- 1 tablespoon apple cider vinegar (or fresh lemon juice)
- ½ teaspoon dried thyme or Italian seasoning (optional but adds depth)
- Red pepper flakes, to taste (if you like a tiny kick)
For Thickening (optional):
- 1 tablespoon cornstarch + 1 tablespoon water
A quick note on the butter: I always use unsalted so I can control the seasoning. If you only have salted butter, reduce the soy sauce slightly or skip adding extra salt.
Chicken Thighs vs. Chicken Breasts: Which Should You Use?
This is the question I get asked most. Honestly? Both work, but they cook differently.
Chicken thighs are my preference for slow cooker recipes. They have more fat, which means they stay moist even after hours of cooking. They’re also more forgiving—if you accidentally cook them an extra hour, they’ll still be tender. The flavor is richer too, which stands up beautifully to the honey butter sauce.
Chicken breasts work if that’s what you prefer or have on hand, but they require a bit more attention. Because they’re leaner, they can dry out if overcooked. If you’re using breasts, I’d recommend checking them at the 3-hour mark on low and not going beyond 4 hours. You can also cut them into larger chunks rather than leaving them whole, which helps them cook more evenly and stay juicier.
I’ve made this recipe dozens of times with both, and while thighs are my favorite, I’ve never had a complaint when using breasts as long as I watch the timing.
How to Make Slow Cooker Honey Butter Chicken
Step 1: Prep the Chicken
Pat your chicken dry with paper towels. This might seem unnecessary, but excess moisture can water down your sauce. Season both sides with salt, pepper, and paprika. If you’re using chicken breasts, you can cut them into 2–3 large pieces so they cook more evenly. Thighs can go in whole.
Step 2: Make the Sauce
In a microwave-safe bowl or small saucepan, melt the butter. Whisk in the honey, soy sauce, minced garlic, vinegar, and any dried herbs or spices you’re using. It should smell incredible already.
Some people skip melting the butter first and just toss everything in the slow cooker, but I’ve found that mixing the sauce beforehand gives you better control and ensures the honey dissolves completely.
Step 3: Arrange in the Slow Cooker
Place your chicken in a single layer at the bottom of the slow cooker. Pour the honey butter sauce over the top, making sure each piece gets coated. If you have overlapping chicken, spoon a bit of sauce over the top layer.
Step 4: Set It and (Mostly) Forget It
Cover and cook on low for 4–5 hours or high for 2–3 hours.
Here’s my timing rule: For chicken thighs, I go 4–5 hours on low or 2.5–3 hours on high. For chicken breasts, I stick to 3–4 hours on low or 2–2.5 hours on high. The chicken is done when it reaches an internal temperature of 165°F and shreds easily with a fork.
Step 5: Thicken the Sauce (If Needed)
This is where you assess. After cooking, the sauce will be thinner than when you started because the chicken releases moisture. If you like it as-is, great—it’s delicious spooned over rice. If you want it thicker and more glaze-like, here’s what I do:
Remove the chicken to a plate. Mix 1 tablespoon cornstarch with 1 tablespoon cold water to make a slurry. Turn the slow cooker to high, whisk in the slurry, and let it cook uncovered for 10–15 minutes, stirring occasionally. The sauce will thicken into a beautiful glaze.
Alternatively, you can transfer the sauce to a saucepan and simmer it on the stovetop for faster thickening.
Step 6: Finish and Serve
Return the chicken to the slow cooker and toss it in the thickened sauce. Taste and adjust—sometimes I add a squeeze of lemon juice or a pinch more salt at this stage.
Common Mistakes and How to Avoid Them
Dry chicken: Almost always from overcooking, especially with breasts. Use a meat thermometer and pull the chicken when it hits 165°F. Also, don’t lift the lid constantly during cooking—every peek releases heat and adds cooking time.
Sauce too sweet: If you taste the sauce and it’s too sugary, balance it with more soy sauce (adds salt and umami), a splash of vinegar, or even a squeeze of lime. I’ve also added a teaspoon of Dijon mustard before, which sounds weird but works.
Lack of depth: This usually means not enough garlic or salt. Don’t skimp on the garlic, and remember that honey can mask saltiness, so you might need more seasoning than you think. Fresh cracked black pepper helps too.
Watery sauce: Totally normal. Use the cornstarch slurry method above, or plan to serve it over something absorbent like rice or mashed potatoes.
Ingredient Swaps and Variations
Dairy-free: Use vegan butter or coconut oil instead of butter. Coconut oil will add a subtle coconut flavor, which actually pairs nicely with honey.
Different sweeteners: Maple syrup works beautifully in place of honey. Brown sugar is another option, though you’ll need to dissolve it in the melted butter.
Add heat: Sriracha, red pepper flakes, or a diced jalapeño can turn this into honey butter chicken with a kick.
Garlic lovers: Double the garlic. Add fresh minced garlic when you make the sauce, then toss in a few more cloves during the last hour of cooking.
Herb variations: Fresh thyme, rosemary, or sage added during cooking can make this feel more earthy and sophisticated.
What to Serve With Honey Butter Chicken
This dish begs for something to soak up that sauce. Here are my favorite pairings:
- White rice or jasmine rice: The classic. The rice absorbs the sauce perfectly.
- Mashed potatoes: Creamy, buttery mashed potatoes with honey butter chicken is comfort food heaven.
- Cauliflower rice: If you’re going lower-carb, this works surprisingly well.
- Roasted vegetables: Brussels sprouts, broccoli, or green beans balance the sweetness with their slight char.
- Egg noodles: Toss them in the sauce for an easy one-pot feel.
If you’re in the mood for more cozy, warming sides, something like loaded baked potato soup makes a hearty starter, especially on cold nights.
And if you’re looking for another easy slow cooker option to add to your rotation, this one-pot cabbage soup is another low-effort, high-reward recipe.
Storage and Reheating
Leftovers keep well in an airtight container in the fridge for up to 4 days. The chicken actually gets even more flavorful as it sits in the sauce.
To reheat, I prefer doing it gently on the stovetop over medium-low heat with a splash of water or chicken broth to loosen the sauce. You can also microwave it in 30-second intervals, stirring between each, but stovetop gives you better texture.
This also freezes beautifully for up to 3 months. Let it cool completely, then portion into freezer bags. Thaw overnight in the fridge and reheat as above.
Final Thoughts
Slow cooker honey butter chicken is one of those recipes that feels like you’re getting away with something. It’s ridiculously easy, requires minimal prep, and delivers restaurant-quality flavor. The chicken stays tender, the sauce is glossy and rich, and your house smells amazing for hours.
I’ve made this on rushed weeknights, for Sunday dinners, and even when we had company over (just doubled the recipe in a larger slow cooker). It’s never let me down. The key is balancing that honey sweetness with savory, salty elements and not overthinking it. Let the slow cooker do what it does best, and you’ll have a dinner that tastes like you spent way more effort than you actually did.
Give it a try, adjust the flavors to your liking, and don’t be surprised when it becomes a regular in your meal rotation.